 Documentation
 # Creating a New App
Once you are registered and are able to access the developer center, you can start by creating your first application on the platform as you begin the development process.
TIP
If you are still unsure about the type of application you want to build, you can refer to developing your first app for more information on the subject.
To create a new app, you can watch the instructional video in the initial Dashboard or follow the steps outlined below to create a new application.
- Go to the Apps section on the left panel and click Create New App to open the new application form and provide the initial details about the new app..

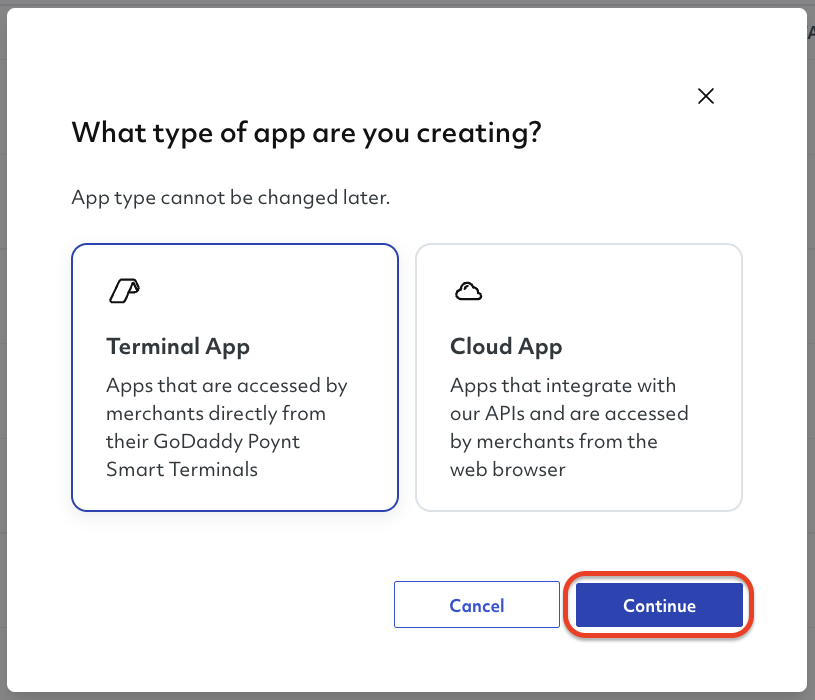
- The first step will be to select the type of application you want to develop, which will enable the Continue button for the next steps.
WARNING!
Once you select the application type, you will not be able to change it.
- You must provide a name for the application, which will be displayed on the App Center once the application goes live.
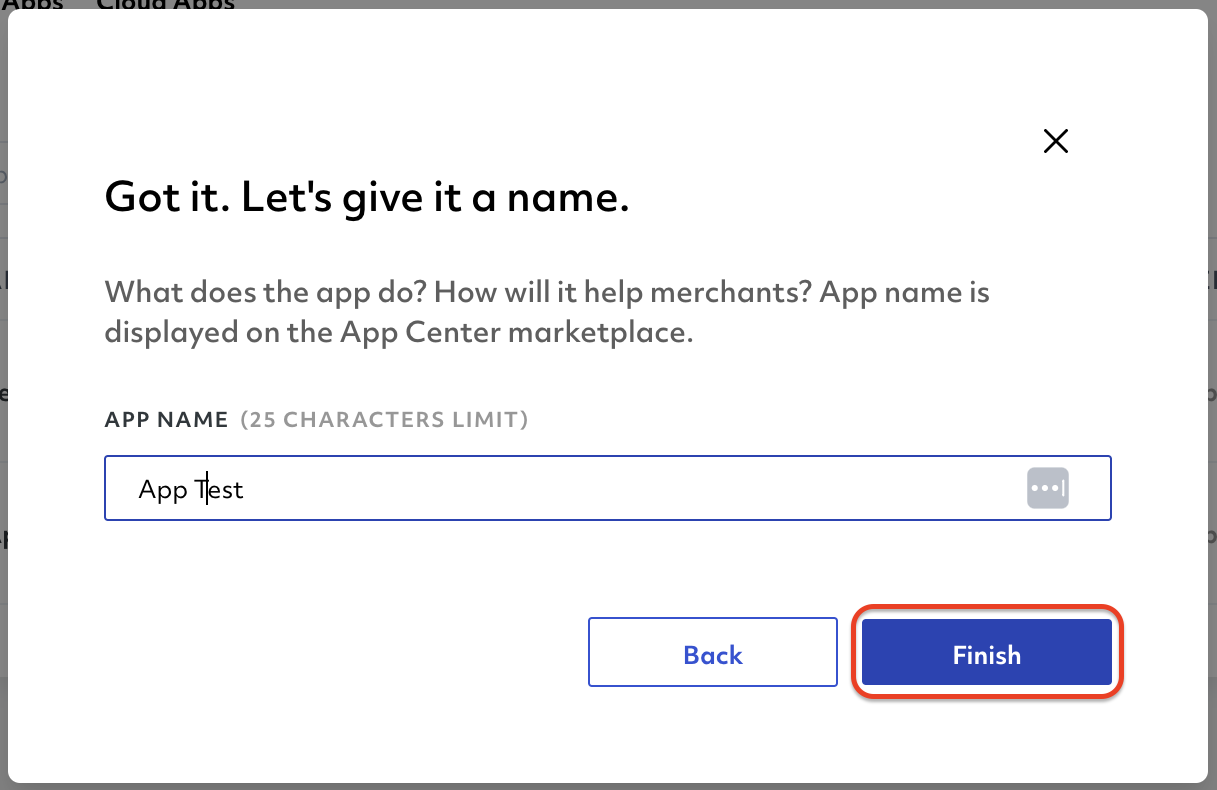
- Once you are ready, you can click Finish to submit your information and create the new app.
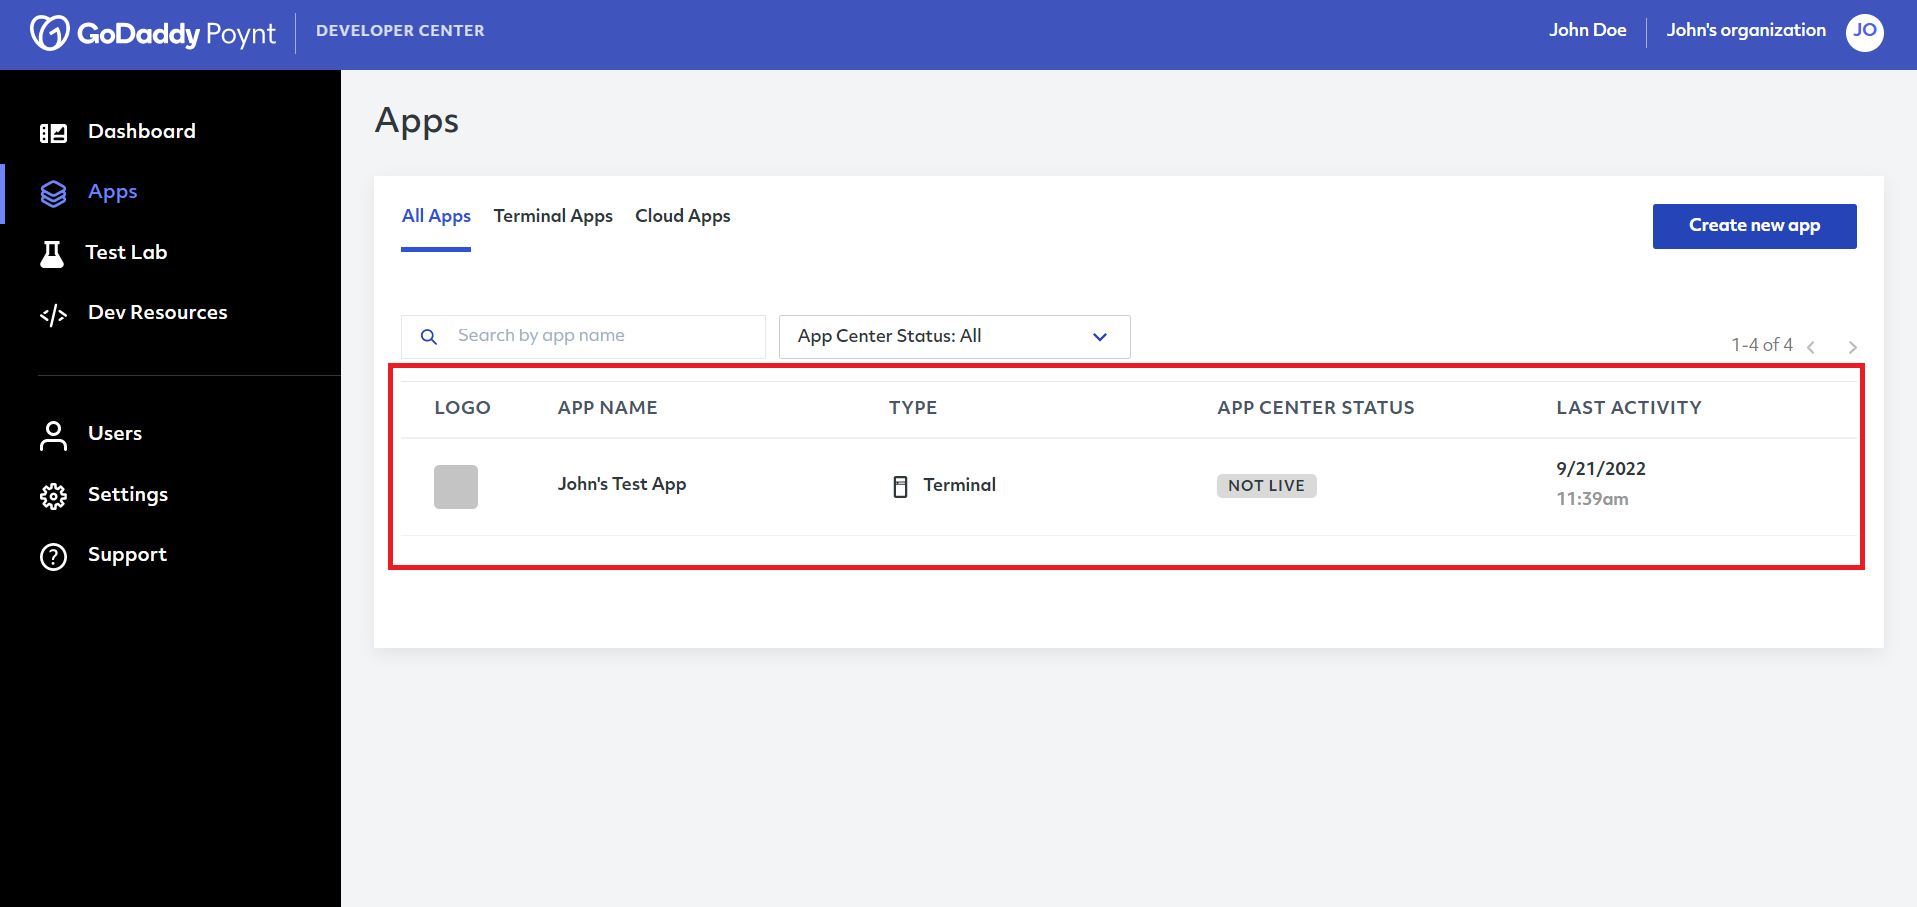
After this, you will be redirected to the Apps list, where you will be able to see the newly created application.
# App Details
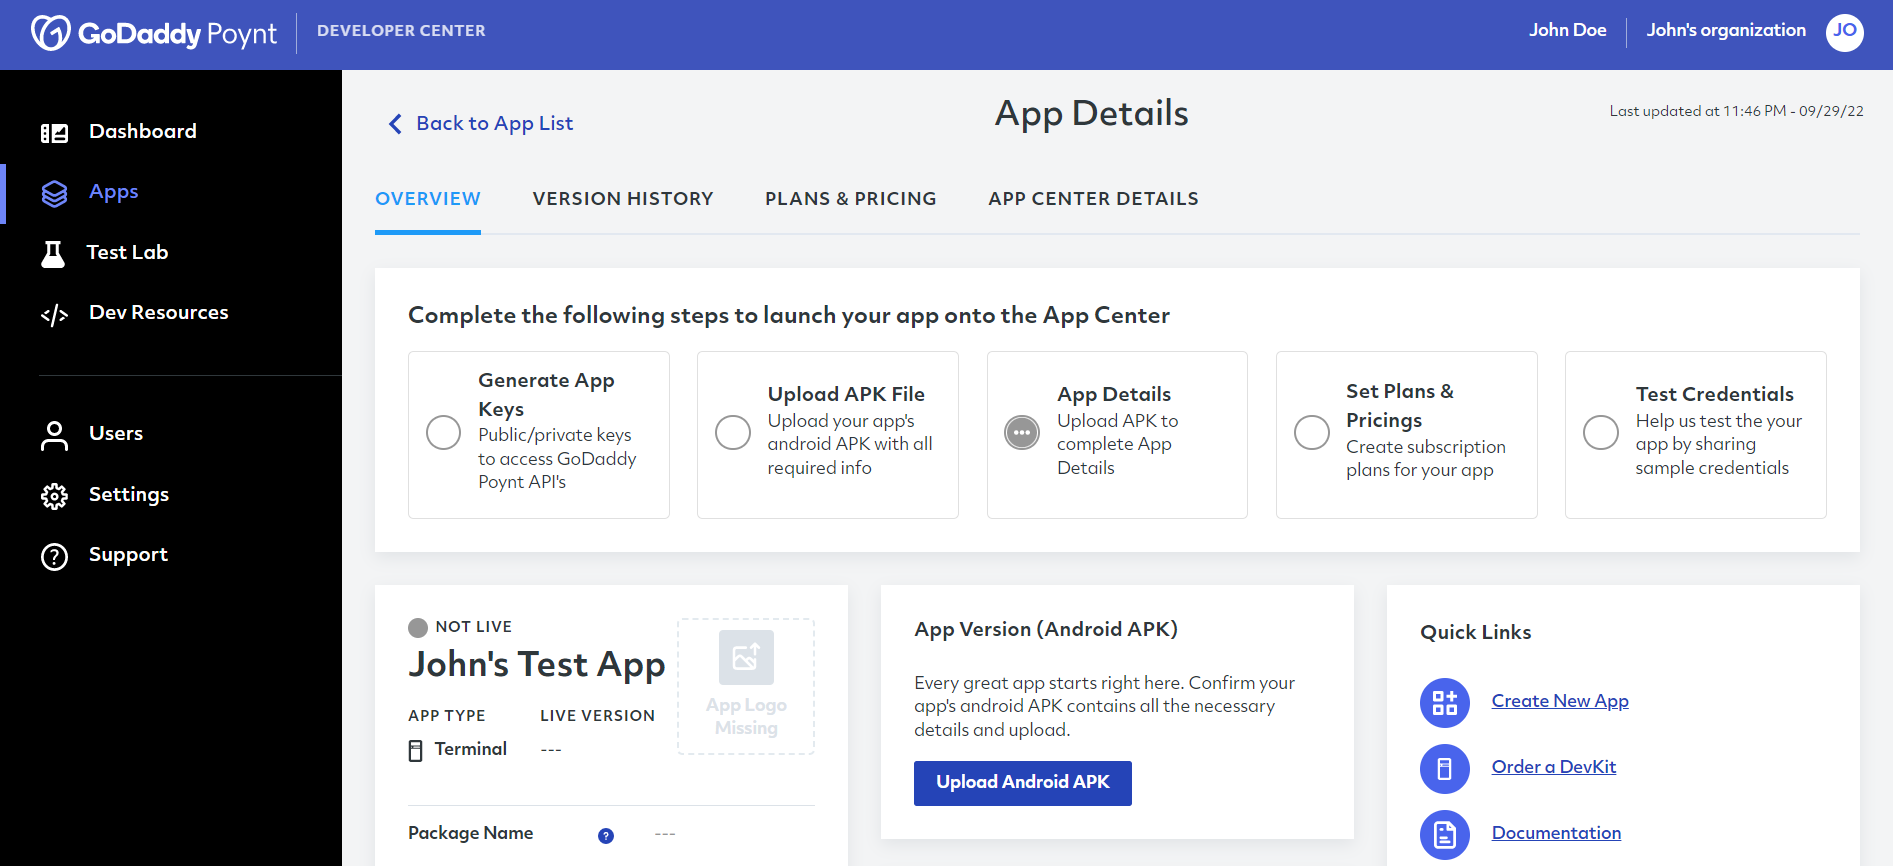
If you click on the newly created application, you will be taken to the App Details page.
The OVERVIEW tab will be the default tab every time you select an application. It contains different resources, quick links, as well as a checklist with the steps you will need to get your application launched to the app center.
# API Permissions
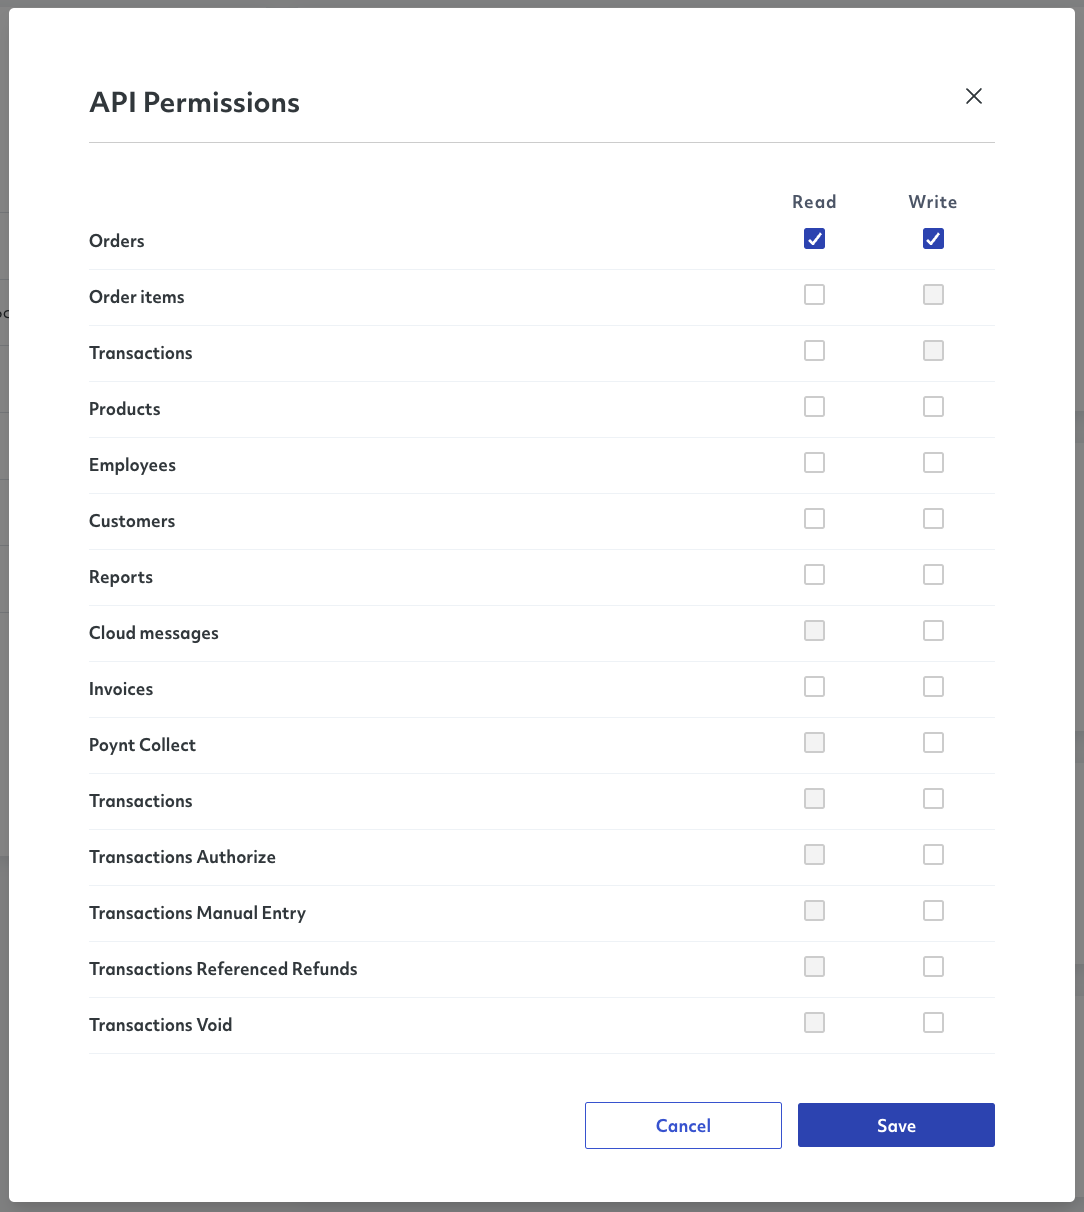
Once you finish creating a new application, you will be presented with a sub-section called API Permissions in the OVERVIEW tab.

Depending on the nature and purpose of your application, you can select the ability to read and/or write for different available APIs.
Additionally, as you continue evolving your application, you will be able to edit these permissions in the future.
TIP
Remember to click Save after selecting your API Permissions to keep your changes.