# Managing Test Merchants
Currently, the Test Lab section found in the left navigation bar is divided into 2 tabs:
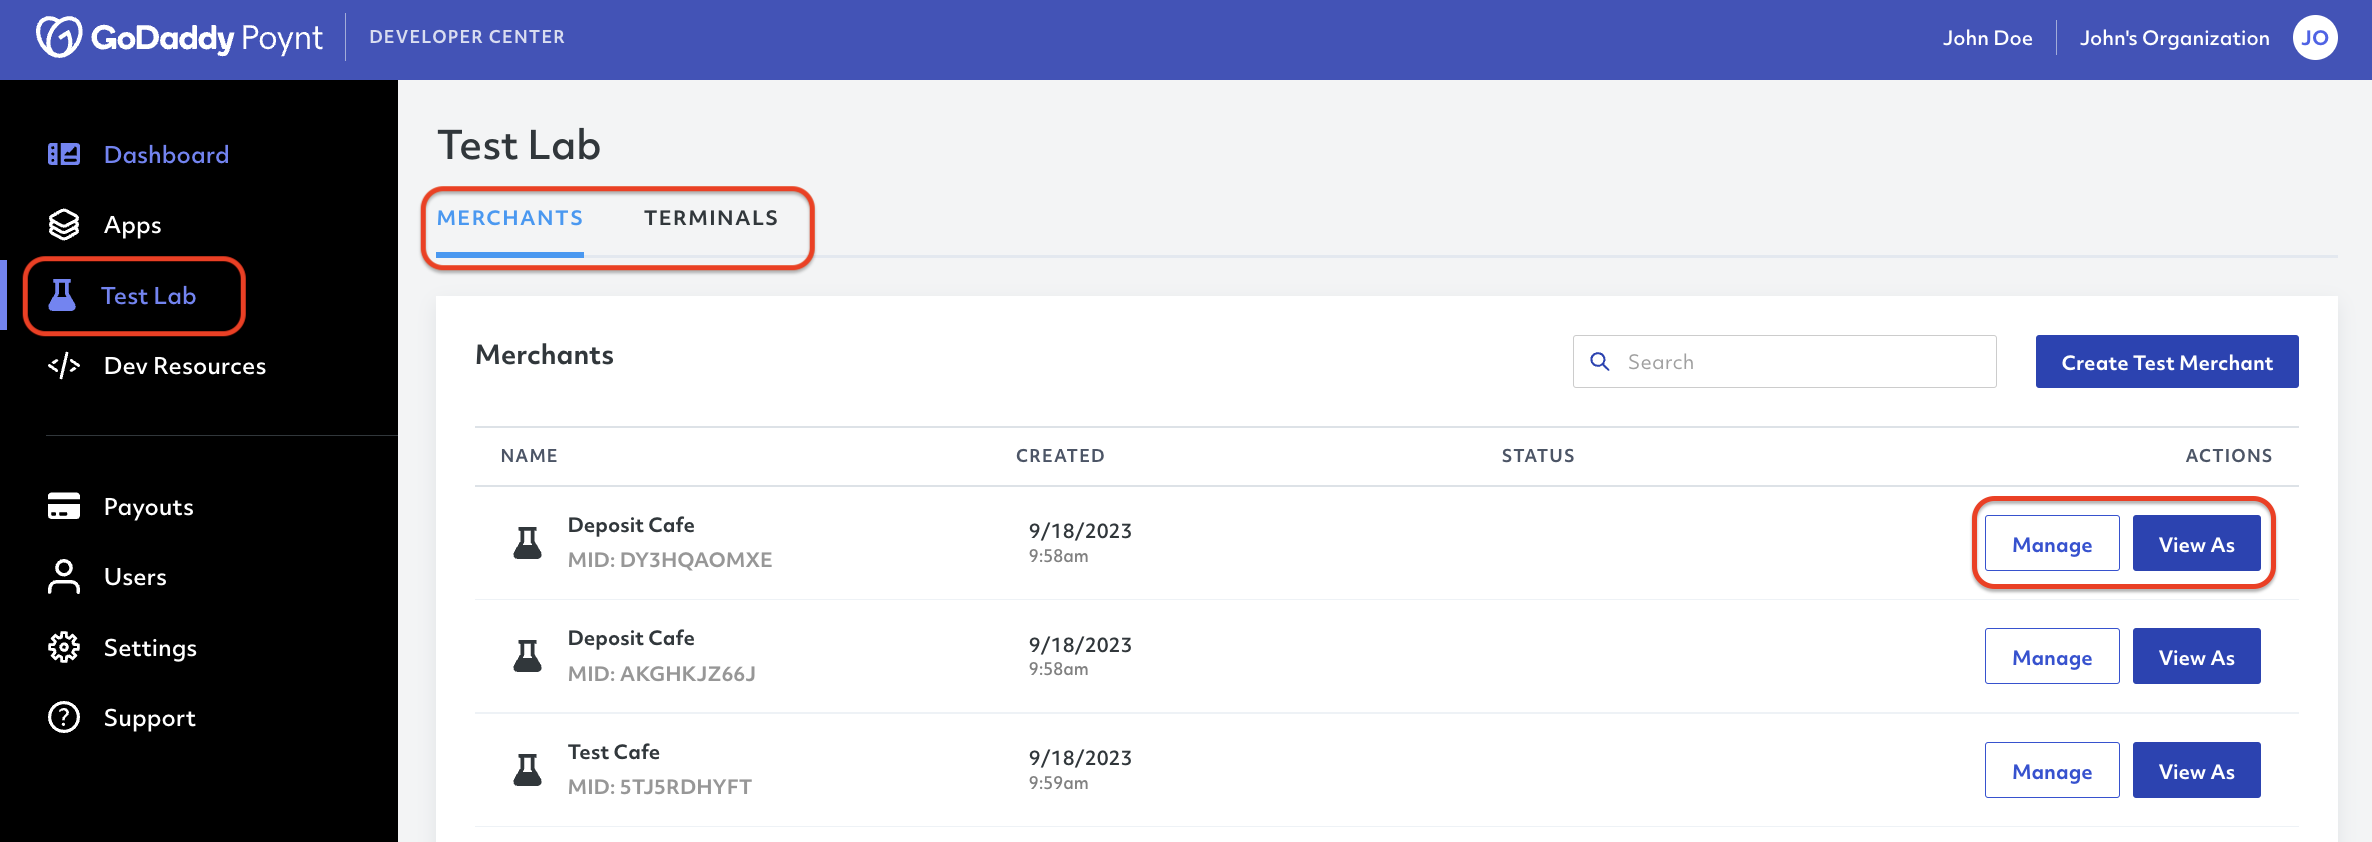
Merchants: This tab will reflect the list of test merchants you have created as well as quick links to View As and Manage your test merchant.
Terminals: Here you will find the list of Smart Terminals and/or Emulators that have been registered to the Test Lab through one or multiple test merchants.
# View As
Clicking View As in any of the test merchants will provide a first-hand merchant experience. This will help you understand what the merchant sees to define what kinds of resources, features and solutions will suit them best.
# Manage
Clicking Manage on any of the test merchants will take you to the default tab of MERCHANT INFO, which showcases all the details for this specific merchant, including contact, address, and locale.
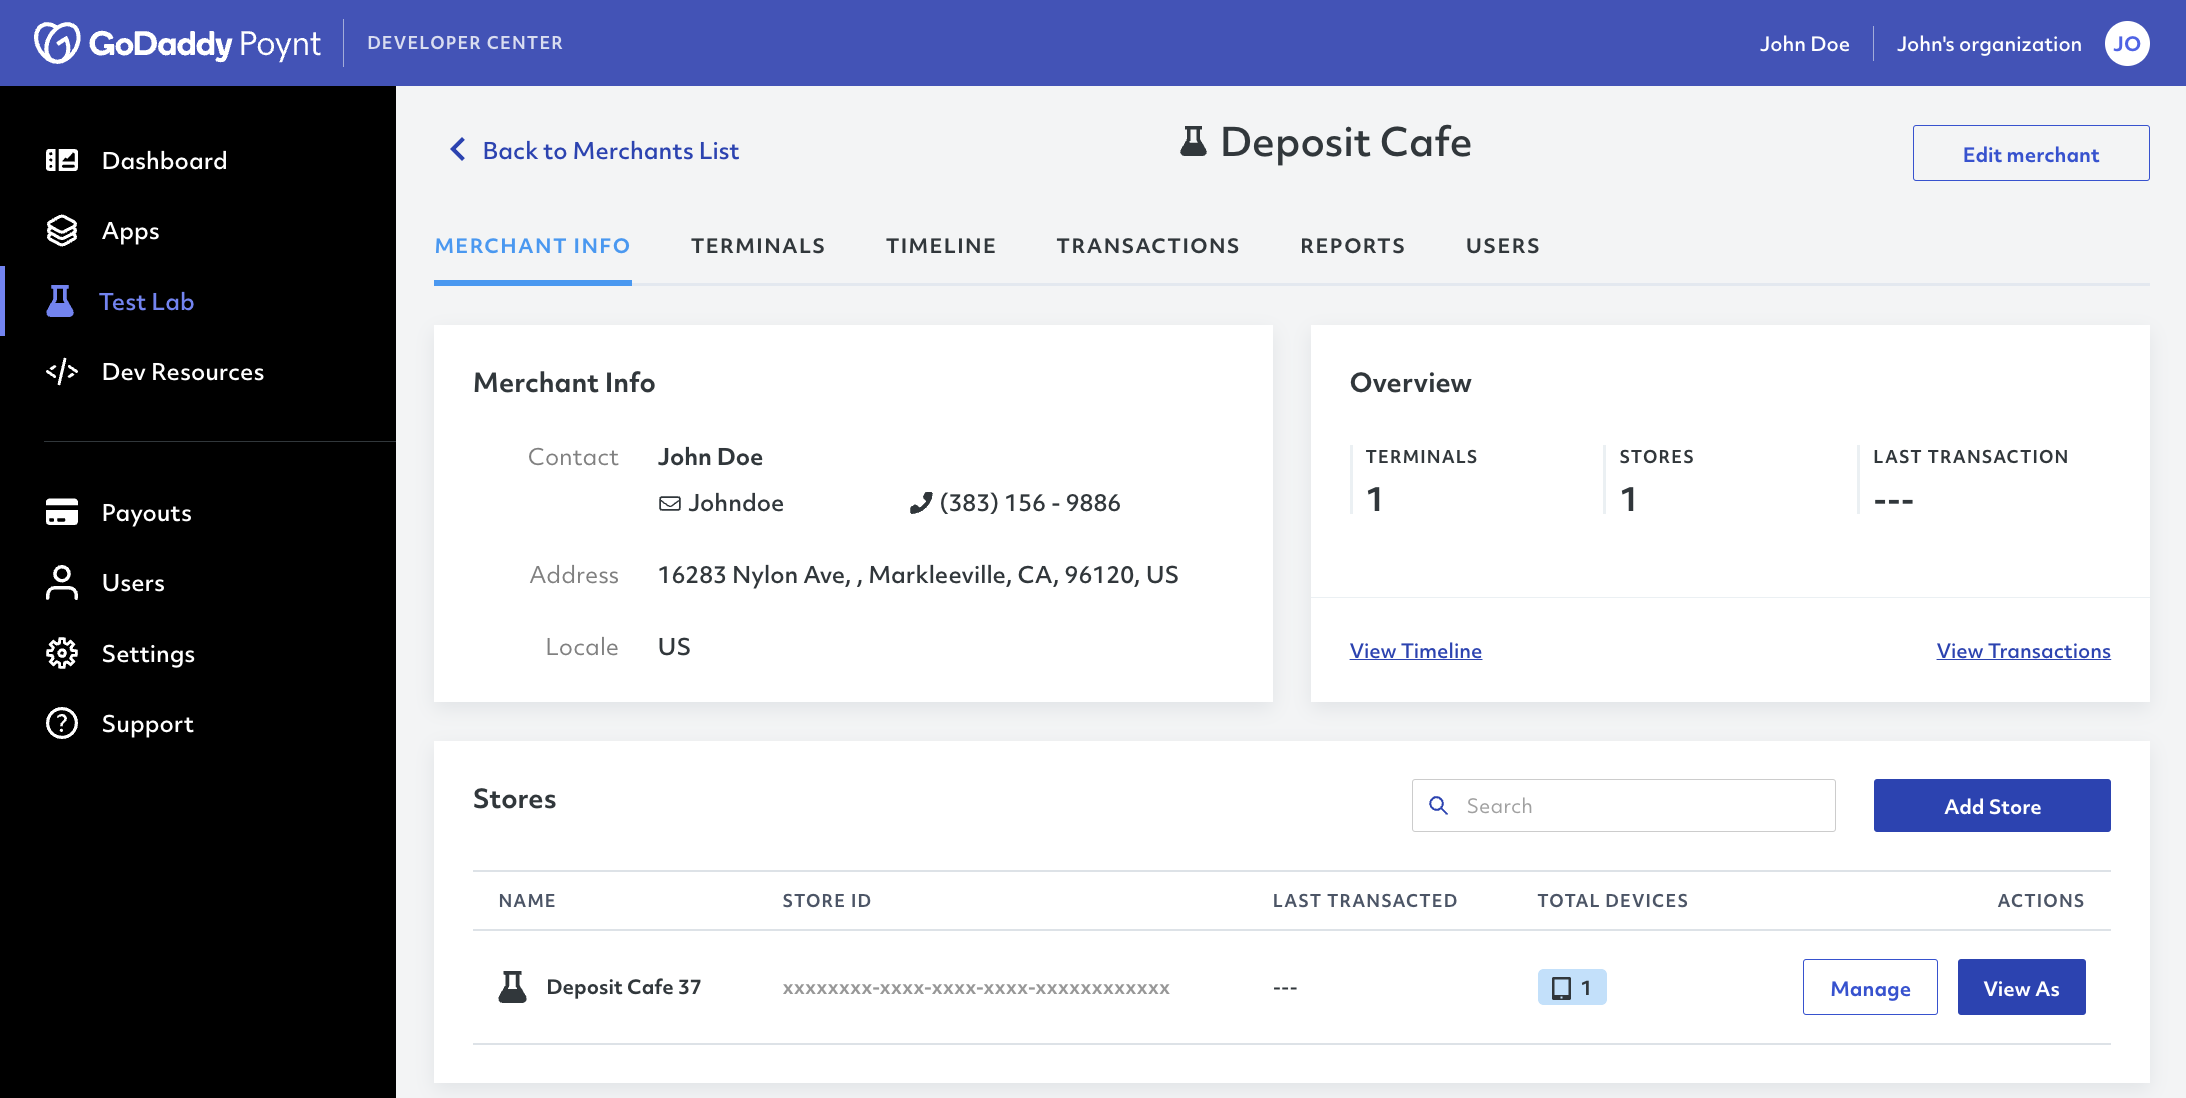
Additionally, each test merchant will have access to the following tabs:
Terminals: This is the total list of Smart Terminals/Emulators that have been registered to a specific test merchant.
Timeline: This tab will track all the changes carried out within a specific test merchant detailing the date, action performed, user responsible for the action and the action's additional details.
Transactions: This is a comprehensive list of transactions carried out by a specific test merchant.
- Each store will also have a Transactions tab. However, it will only record the transactions carried out within that specific store.
Reports: This is a list of the reports generated for each test merchant.
- Each store will also have a Reports tab. However, it will only record the reports generated within that specific store.
Users: Here you can review and manage the different users that have access to the test merchant from the Smart Terminal or from the Web. You can also review the following section to learn how to add web/terminal users.
# Creating a Store
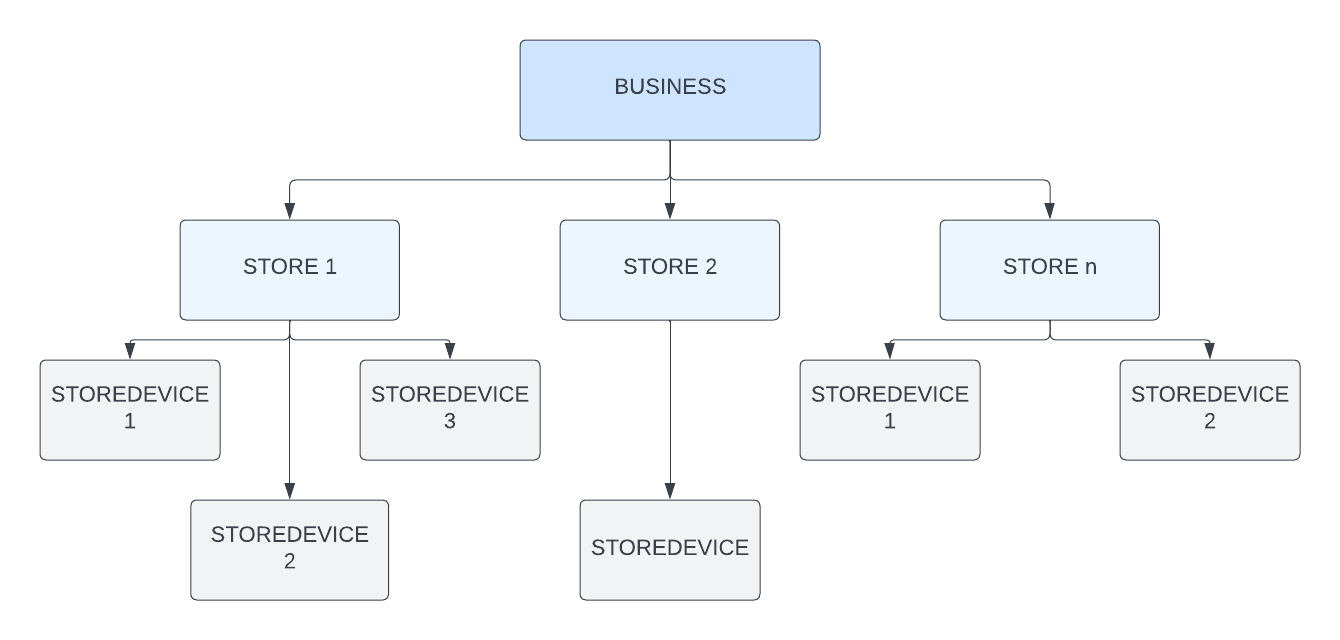
Following the general structure, each merchant is considered a business. This means you can also create multiple stores within a single test merchant and at the same time, register one or multiple Smart Terminals to each of the stores.
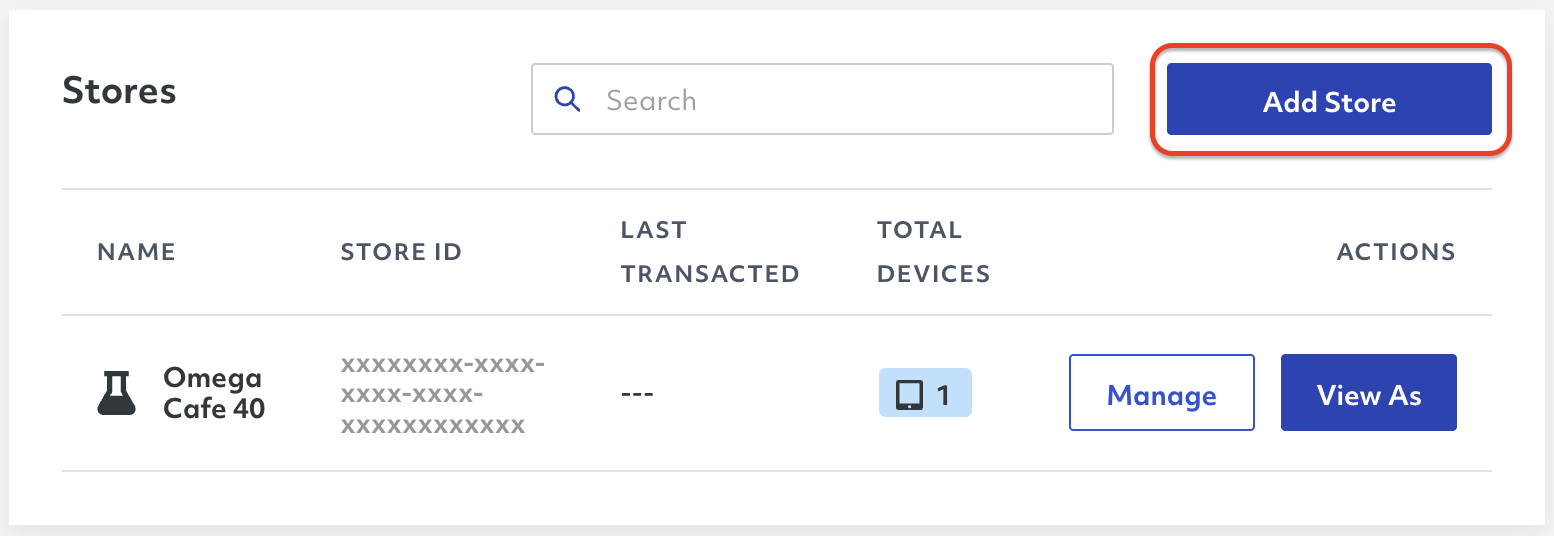
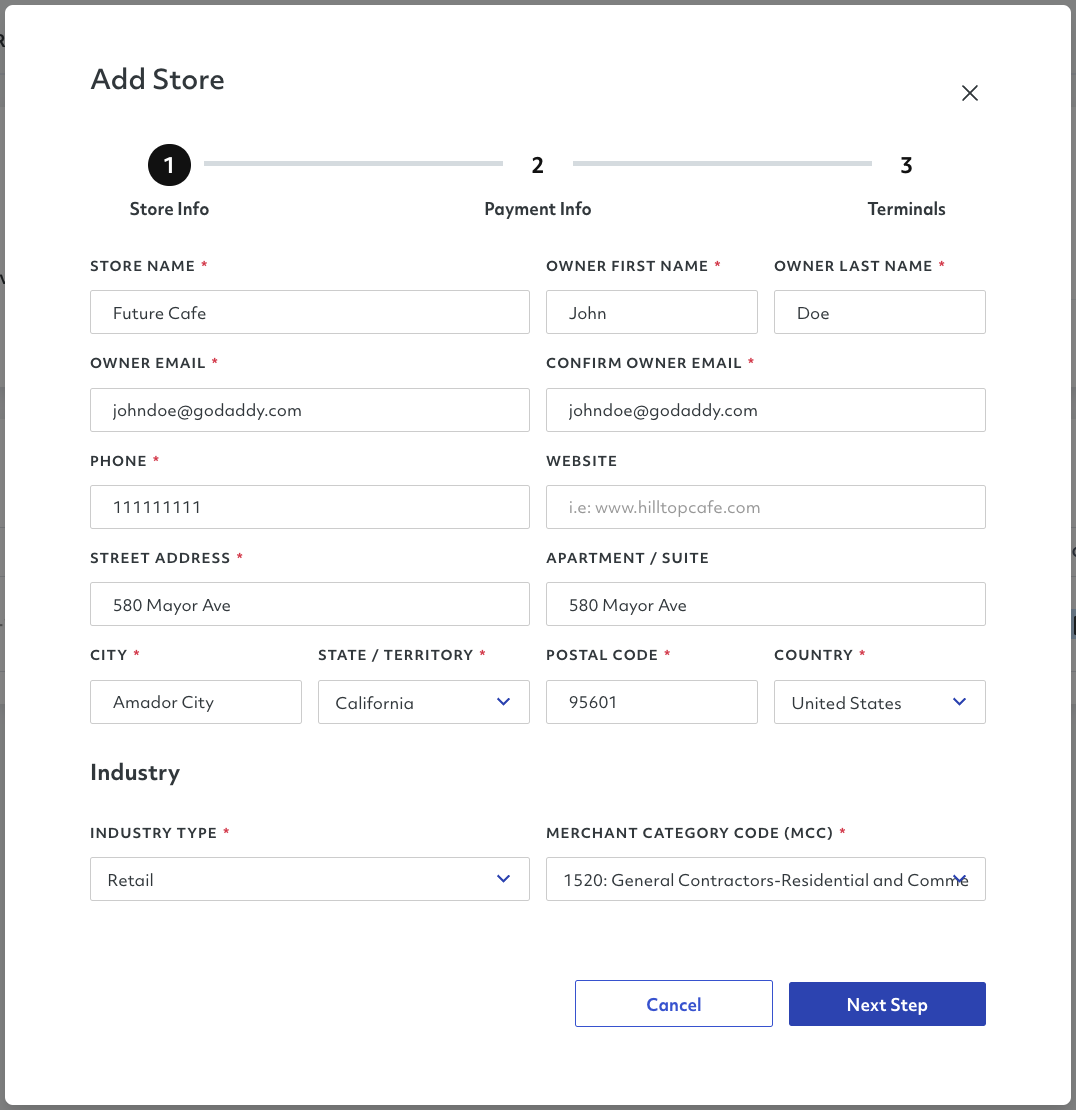
To add a store, simply select your test merchant and click Add Store.
This will open the New Store Form, where you must complete the three step process to add the Store Info, Payment Info, and Terminal Details.
TIP
Remember to click Add Store on the last step to save your changes and create the new store.