# Activating Your Terminal
Once you receive your GoDaddy Poynt Developer Unit, you can follow the instructions below to set it up with a test merchant. You can use this to simulate merchant operations and begin integrating with our SDKs and Cloud APIs.
NOTE
This article is not applicable for Nexi developers. Please reach out to Nexi Support to follow the Nexi device activation process.
# Prerequisites
- Android SDK with Android-API 23 (KitKat).
- GoDaddy Poynt Developer Unit.
- Active Developer Account
- Developer Mode enabled. It provides the ability to install development applications (APKs) on your device.
TIP
Enabling the developer mode may not be required as some units are already configured when they arrive.
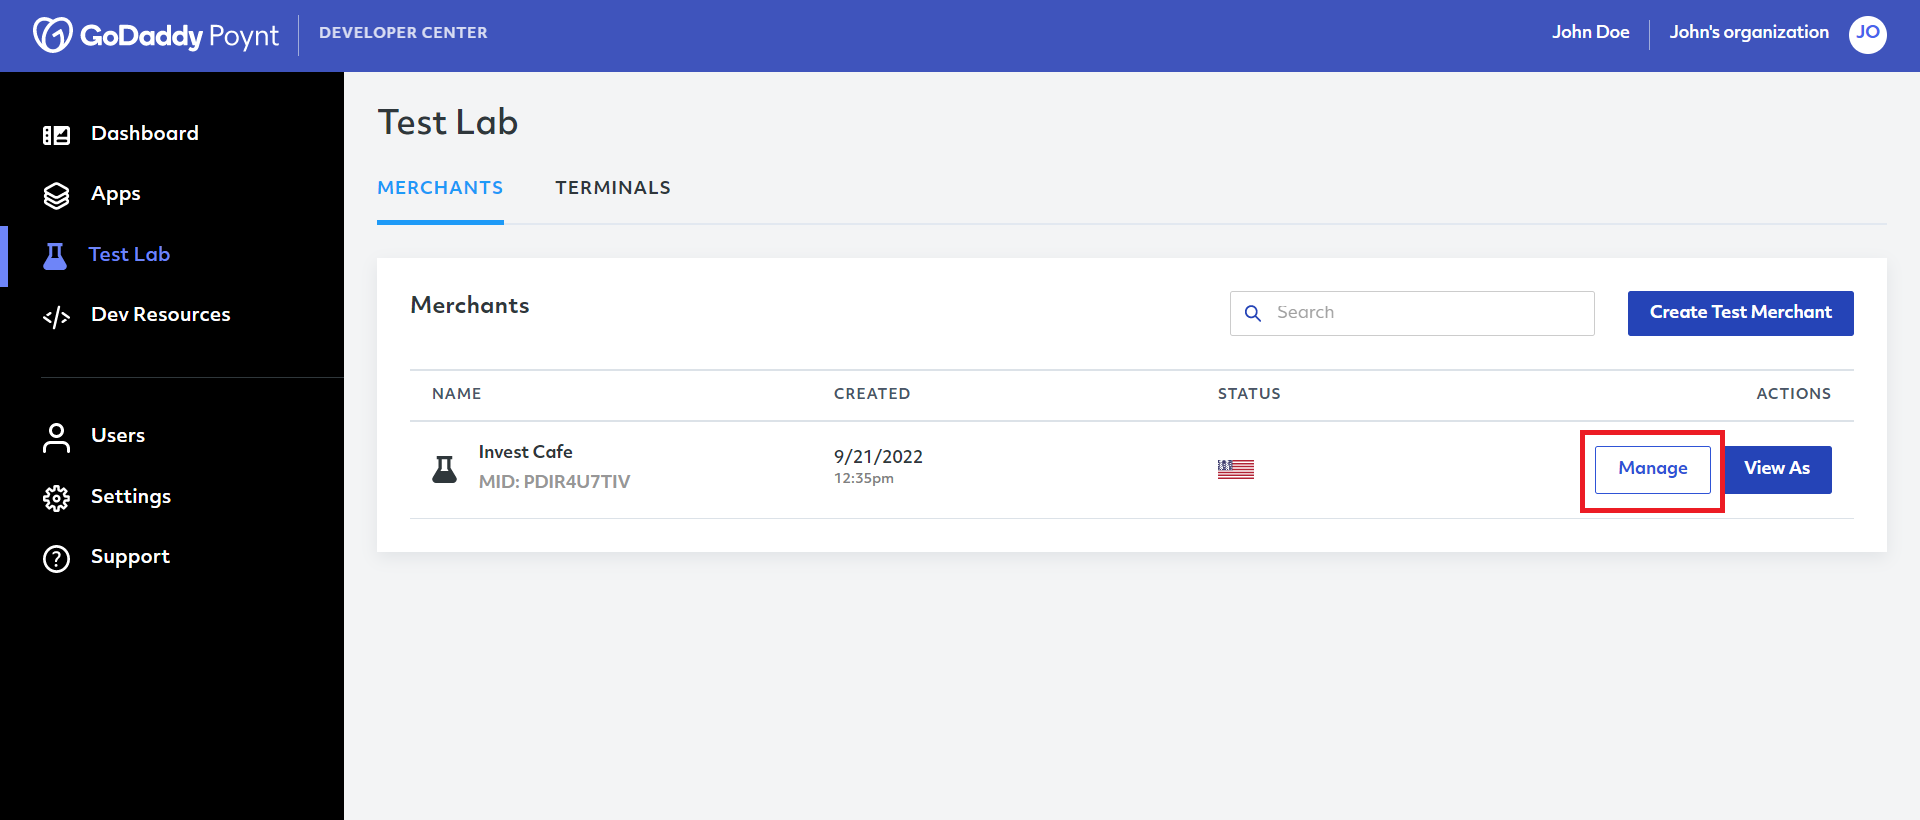
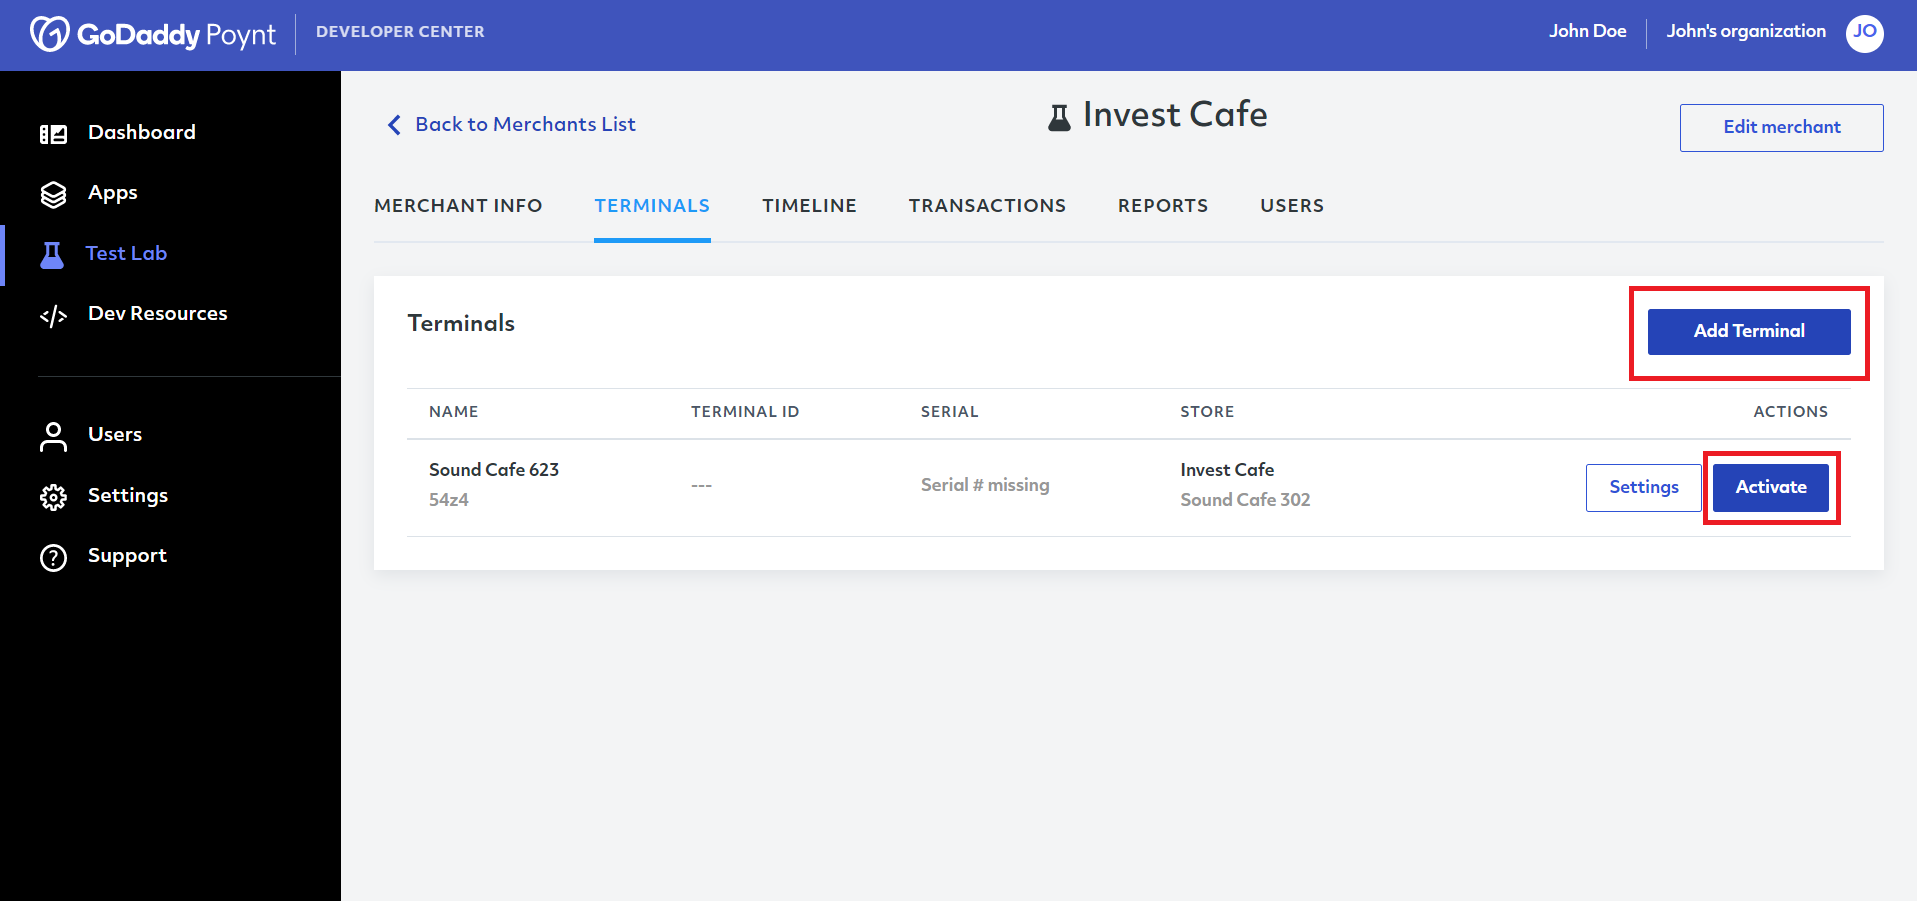
- Go to the Test Lab section and select the test merchant you created previously by clicking on Manage and going to the Terminals tab.
- You can activate your terminal with a specific test merchant by clicking Activate, or click Add Terminal to add a new device manually.
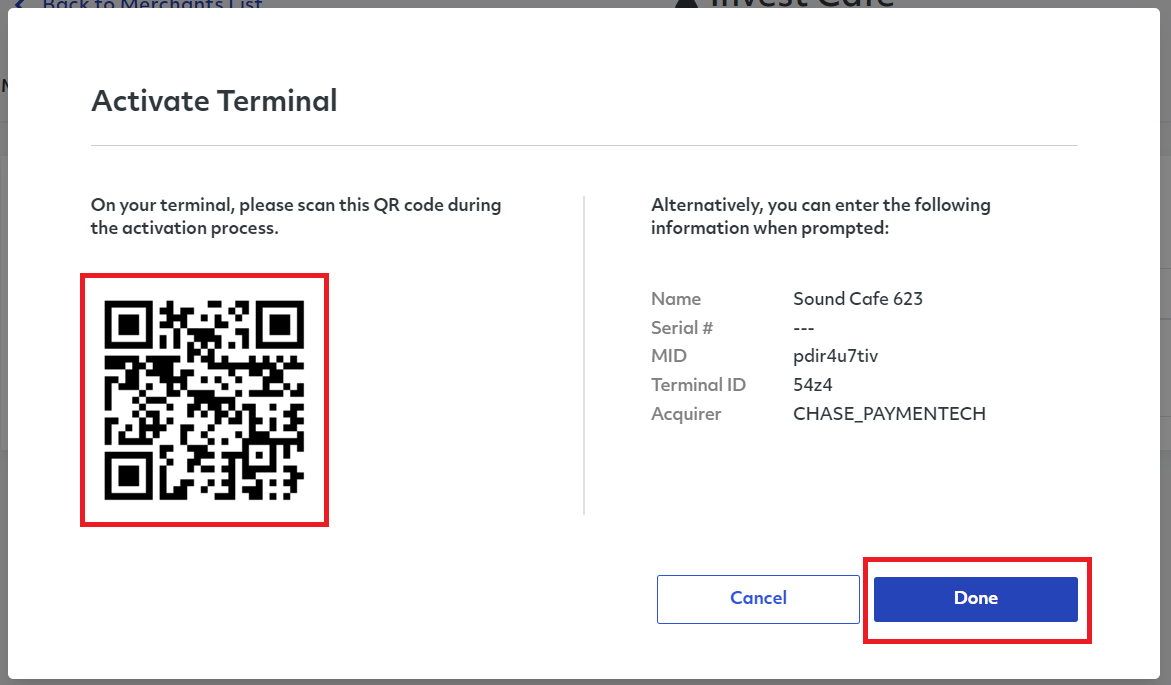
After this, you must turn on your Developer unit and go through the Activation Flow to setup a WiFi connection and install any available updates.
When you are prompted for activation credentials, you can scan the QR code or enter the information shown on the developer center and click Done.
- Once you finish the activation, you will be automatically logged into the device.
- Finally, from the Launcher screen, you can tap on Poynt Terminal or Register Apps to try out the default applications.
If you finished all the steps correctly, your device should now be ready for the development and testing processes.
We look forward to helping you create incredible solutions!