# Paze Integration
# Accept web payments using Paze, process with GoDaddy Payments
Paze Terms
By integrating Paze™, you and your business adhere to:
Paze™ is an online checkout solution offered by participating banks and credit unions, designed to simplify the purchasing process. It enables your customers to make secure payments by linking directly to their bank accounts, eliminating the need to manually enter card details.
Paze is available out-of-the-box with GoDaddy payment products, such as:
- Online Store Checkout
- Online Appointment
Alternatively, you can build your own web payment form and accept Paze payments using Poynt Collect, with minimum code changes. Your backend needs to follow-up and process payments.
# Poynt Collect Integration
Build your own Pay button within your website by following 3 steps:
- Setup GoDaddy Payments business and obtain Poynt Collect API credentials via Poynt HQ
- Implement Paze button via Poynt Collect iFrame on your client side
- Implement Payments API call on your server side
# Checking Paze Availability
To determine if a customer is eligible to use Paze, use the supportWalletPayments method in Poynt Collect. You have two options based on the information you have:
- If you know the email address of a customer, you can pass it as an option to check if the email address exists in the Paze system and if the customer is eligible to use Paze
const result = await collect.supportWalletPayments({
  emailAddress: "test@test.test",
});

if (result.paze) {
  //mount Paze button
}
- If you don't know the email address, you can call
supportWalletPaymentswithout any additional parameters. In this case, only Paze API availability will be checked, andtruewill be returned if Paze is available (in this case the customer will be prompted to verify their email address during checkout process)
const result = await collect.supportWalletPayments();

if (result.paze) {
  //mount Paze button
}
# Rendering the Paze Button
- Once you have confirmed that the customer is eligible to use Paze, you can display the Paze button by calling the mount method and including "paze" in the payment methods:
const result = await collect.supportWalletPayments();

if (result.paze) {
  collect.mount("domElementId", document, {
    ...
    paymentMethods: ["apple_pay", "google_pay", "paze"],
  });
}
- You can customize the button styling and add a custom onClick handler by passing
buttonOptions(applied to all wallets) orpazeButtonOptions(applied only to the Paze button) to the mount options:
const result = await collect.supportWalletPayments();

if (result.paze) {
  const onPazeButtonClick: () => {
    const walletRequestUpdate = {
      total: {
        amount: "20.00",
        label: "Total",
      },
    };

    collect.startPazeSession(walletRequestUpdate);
  };
  collect.mount("domElementId", document, {
    ...
    paymentMethods: ["apple_pay", "google_pay", "paze"],
    buttonOptions: {
      color: "default",
    },
    pazeButtonOptions: {
      onClick: onPazeButtonClick,
    },
  });
}
Please refer to the Wallet API Reference for more details.
# Button Color Options
There are three available button colors for the Paze button:
- Default

- Black

- White

NOTE
Please note that the button type passed in the button options will not have any effect on the styling of the Paze button. The Paze button only displays the Paze logo and does not vary in appearance based on the button type.
# Checkout Process
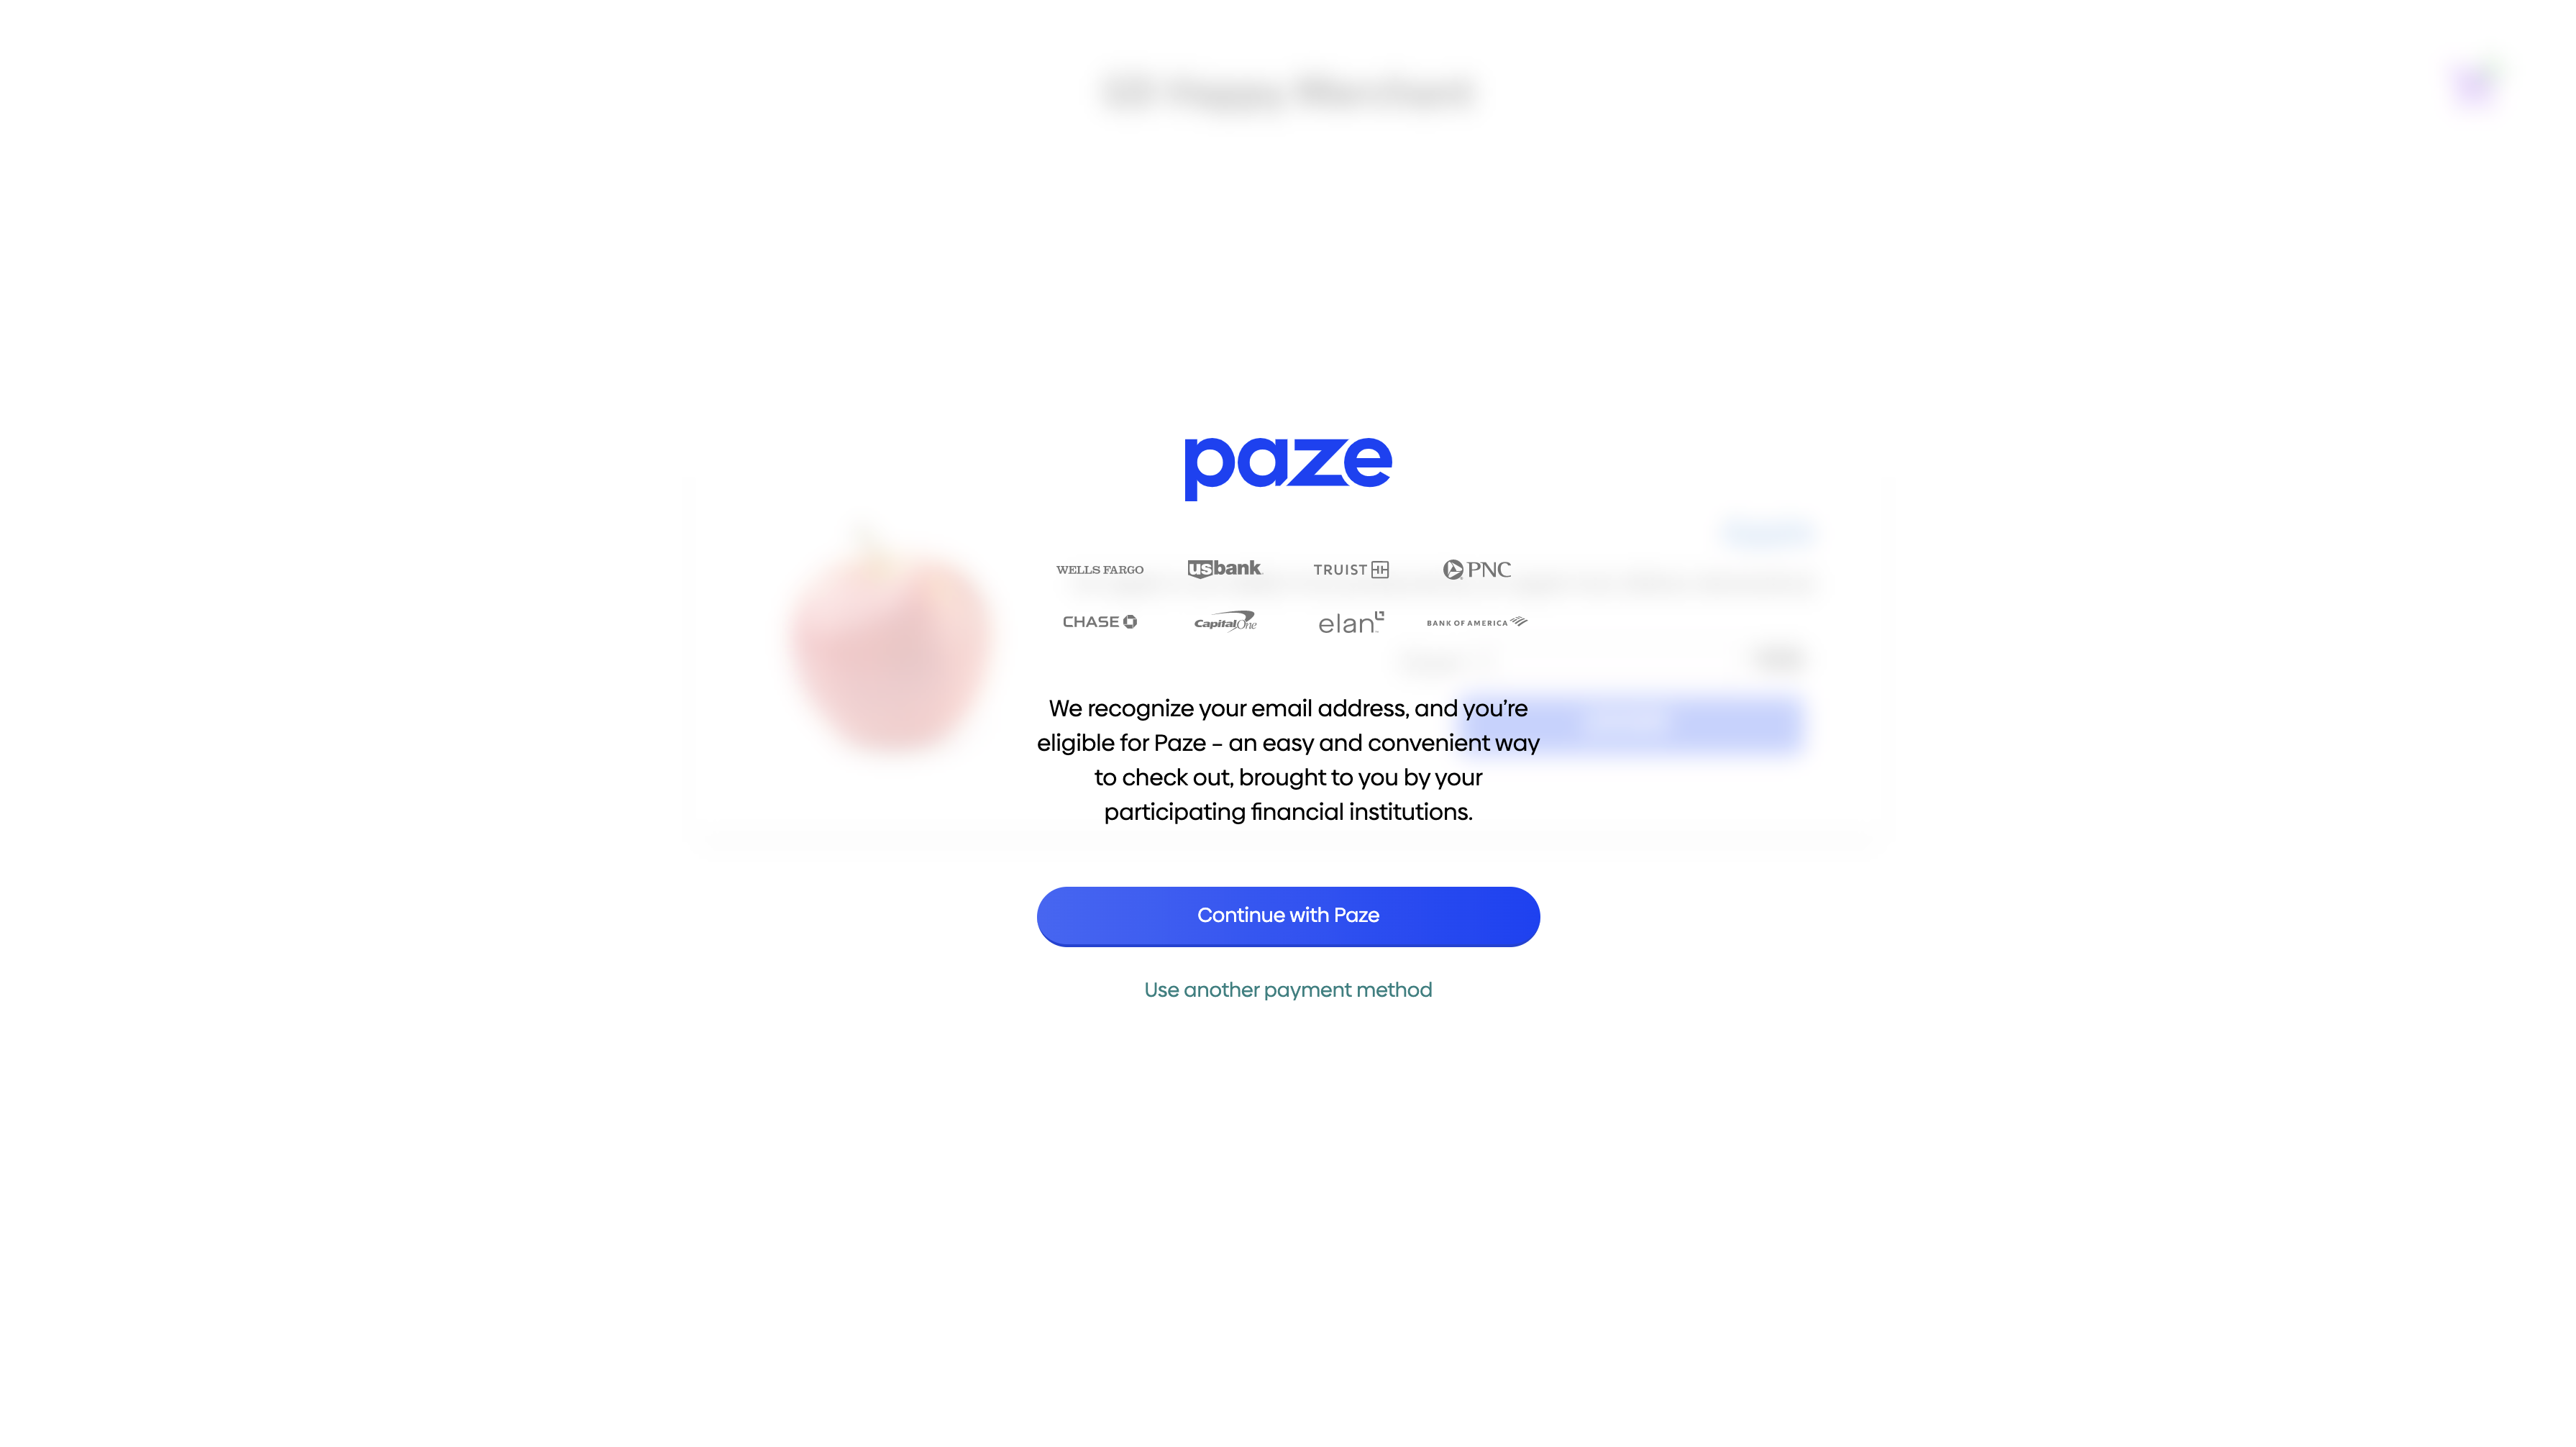
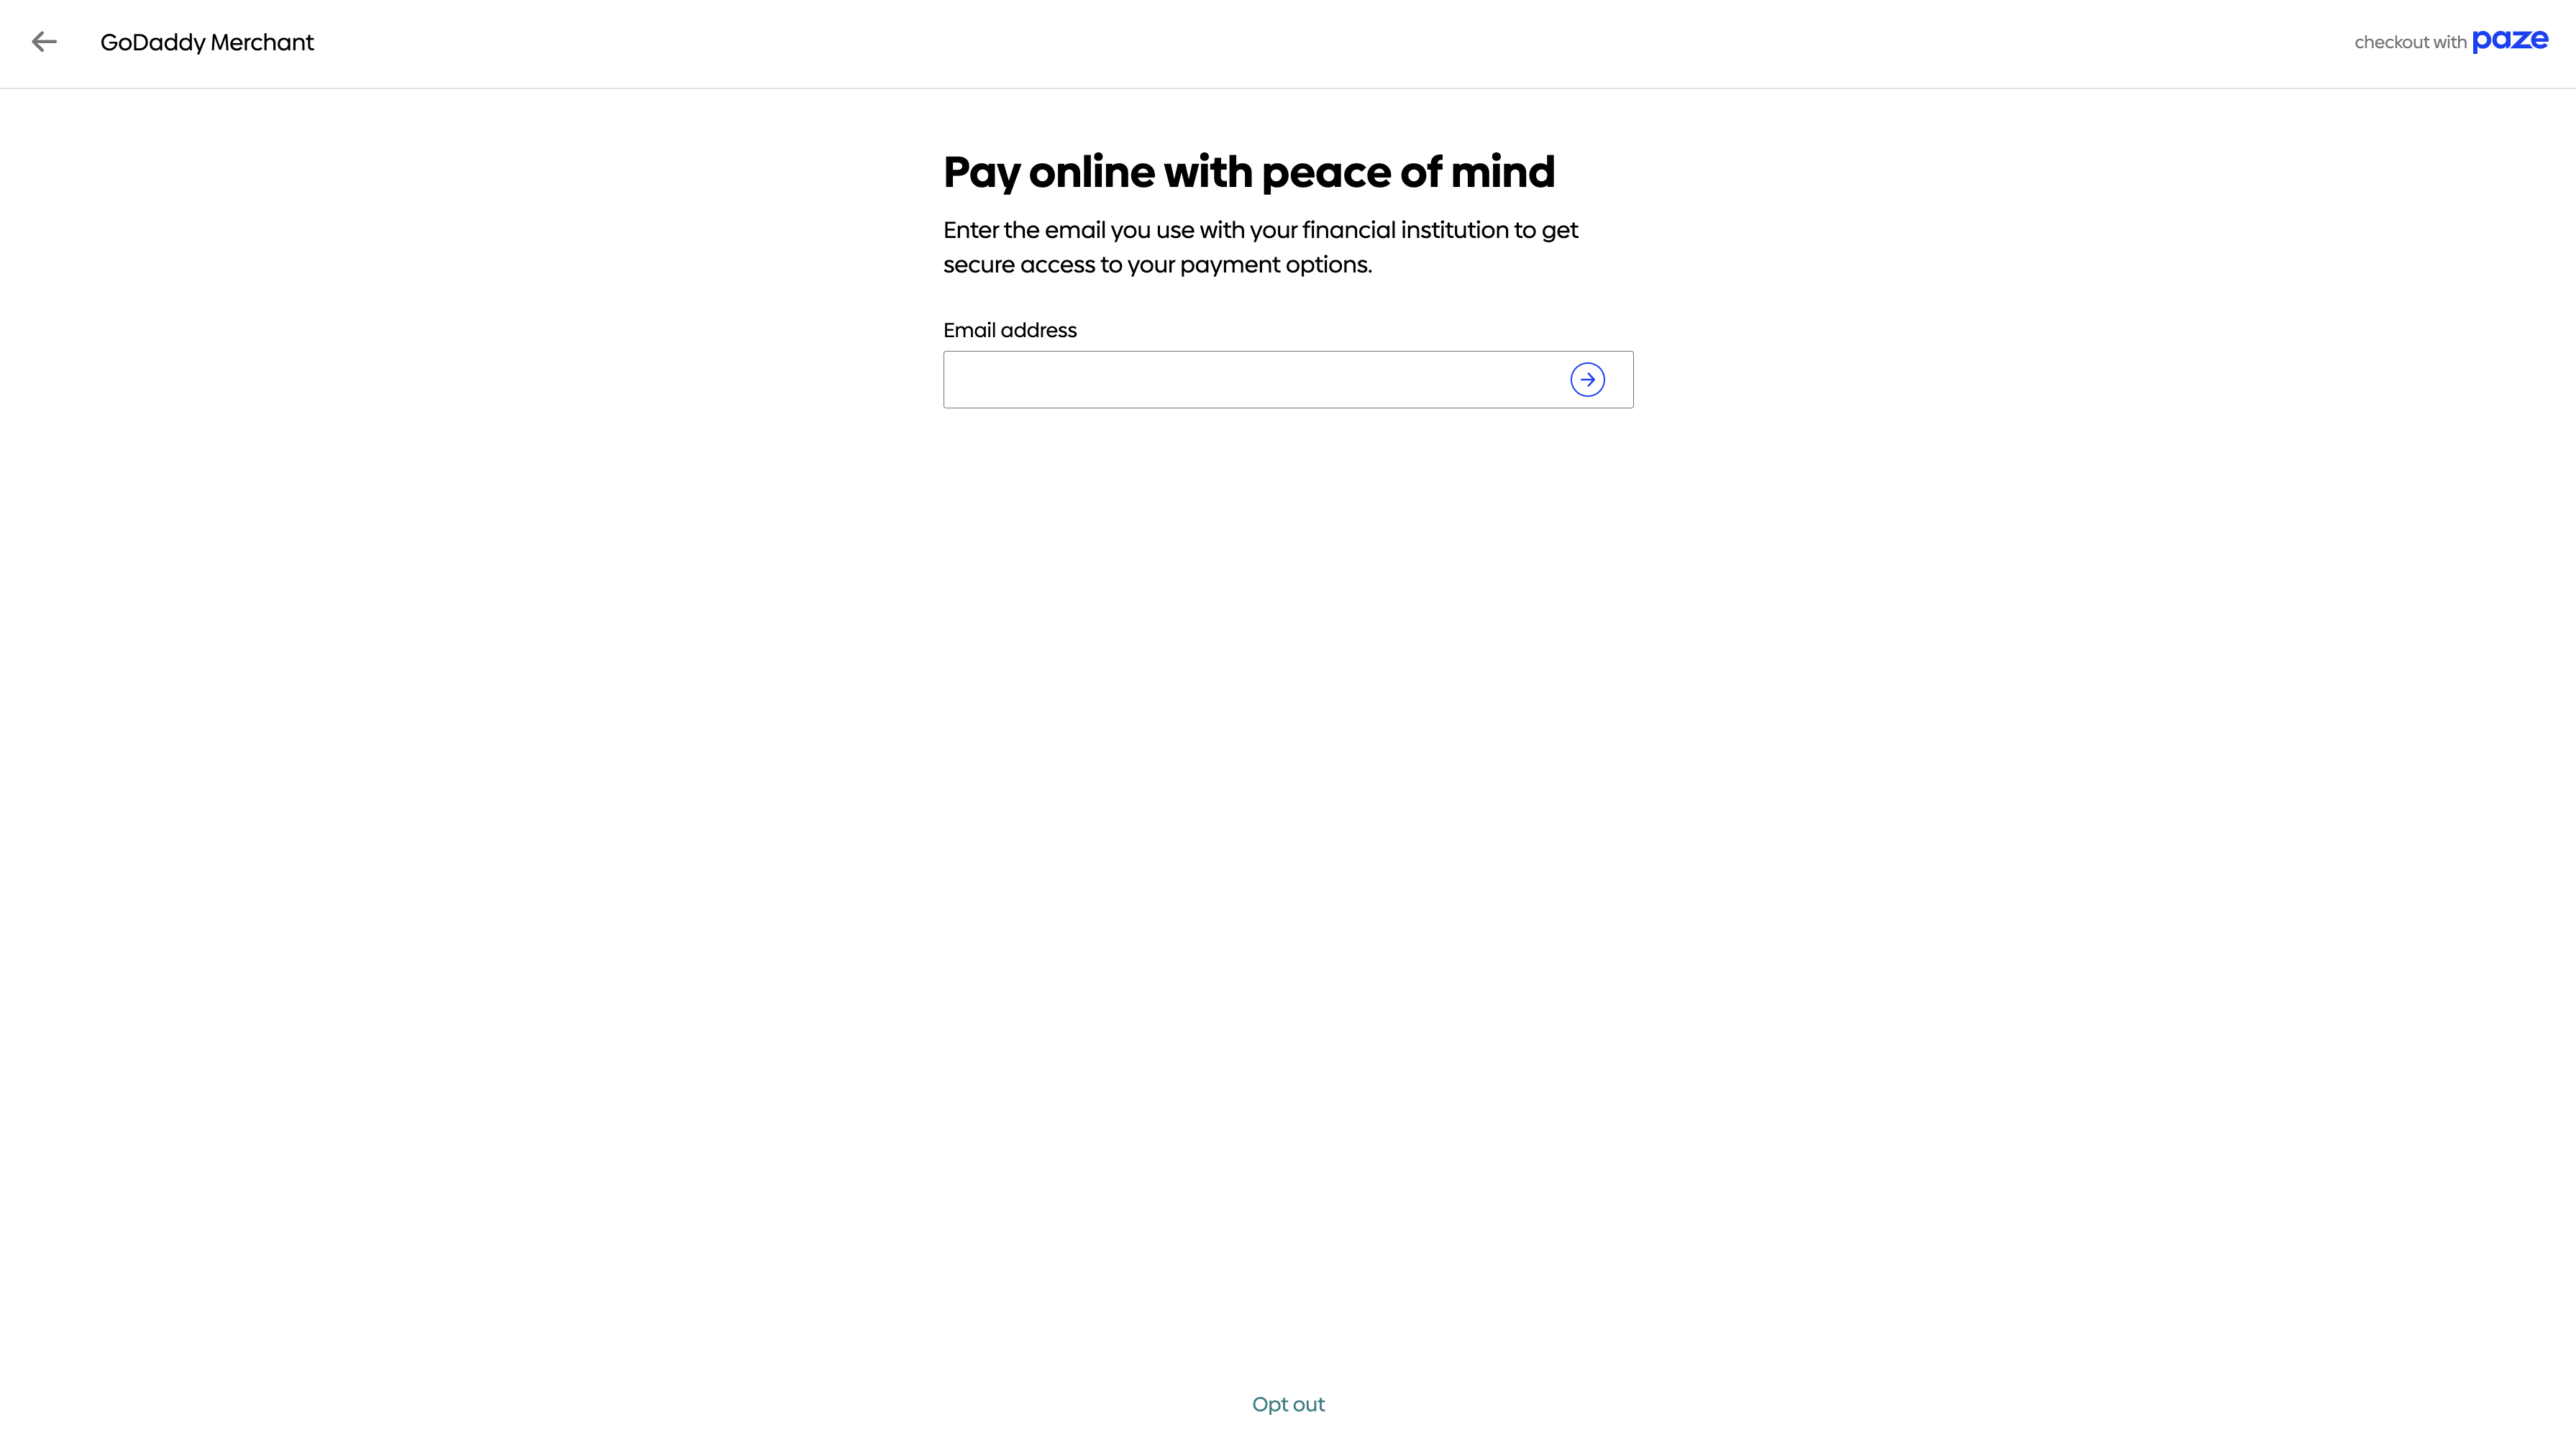
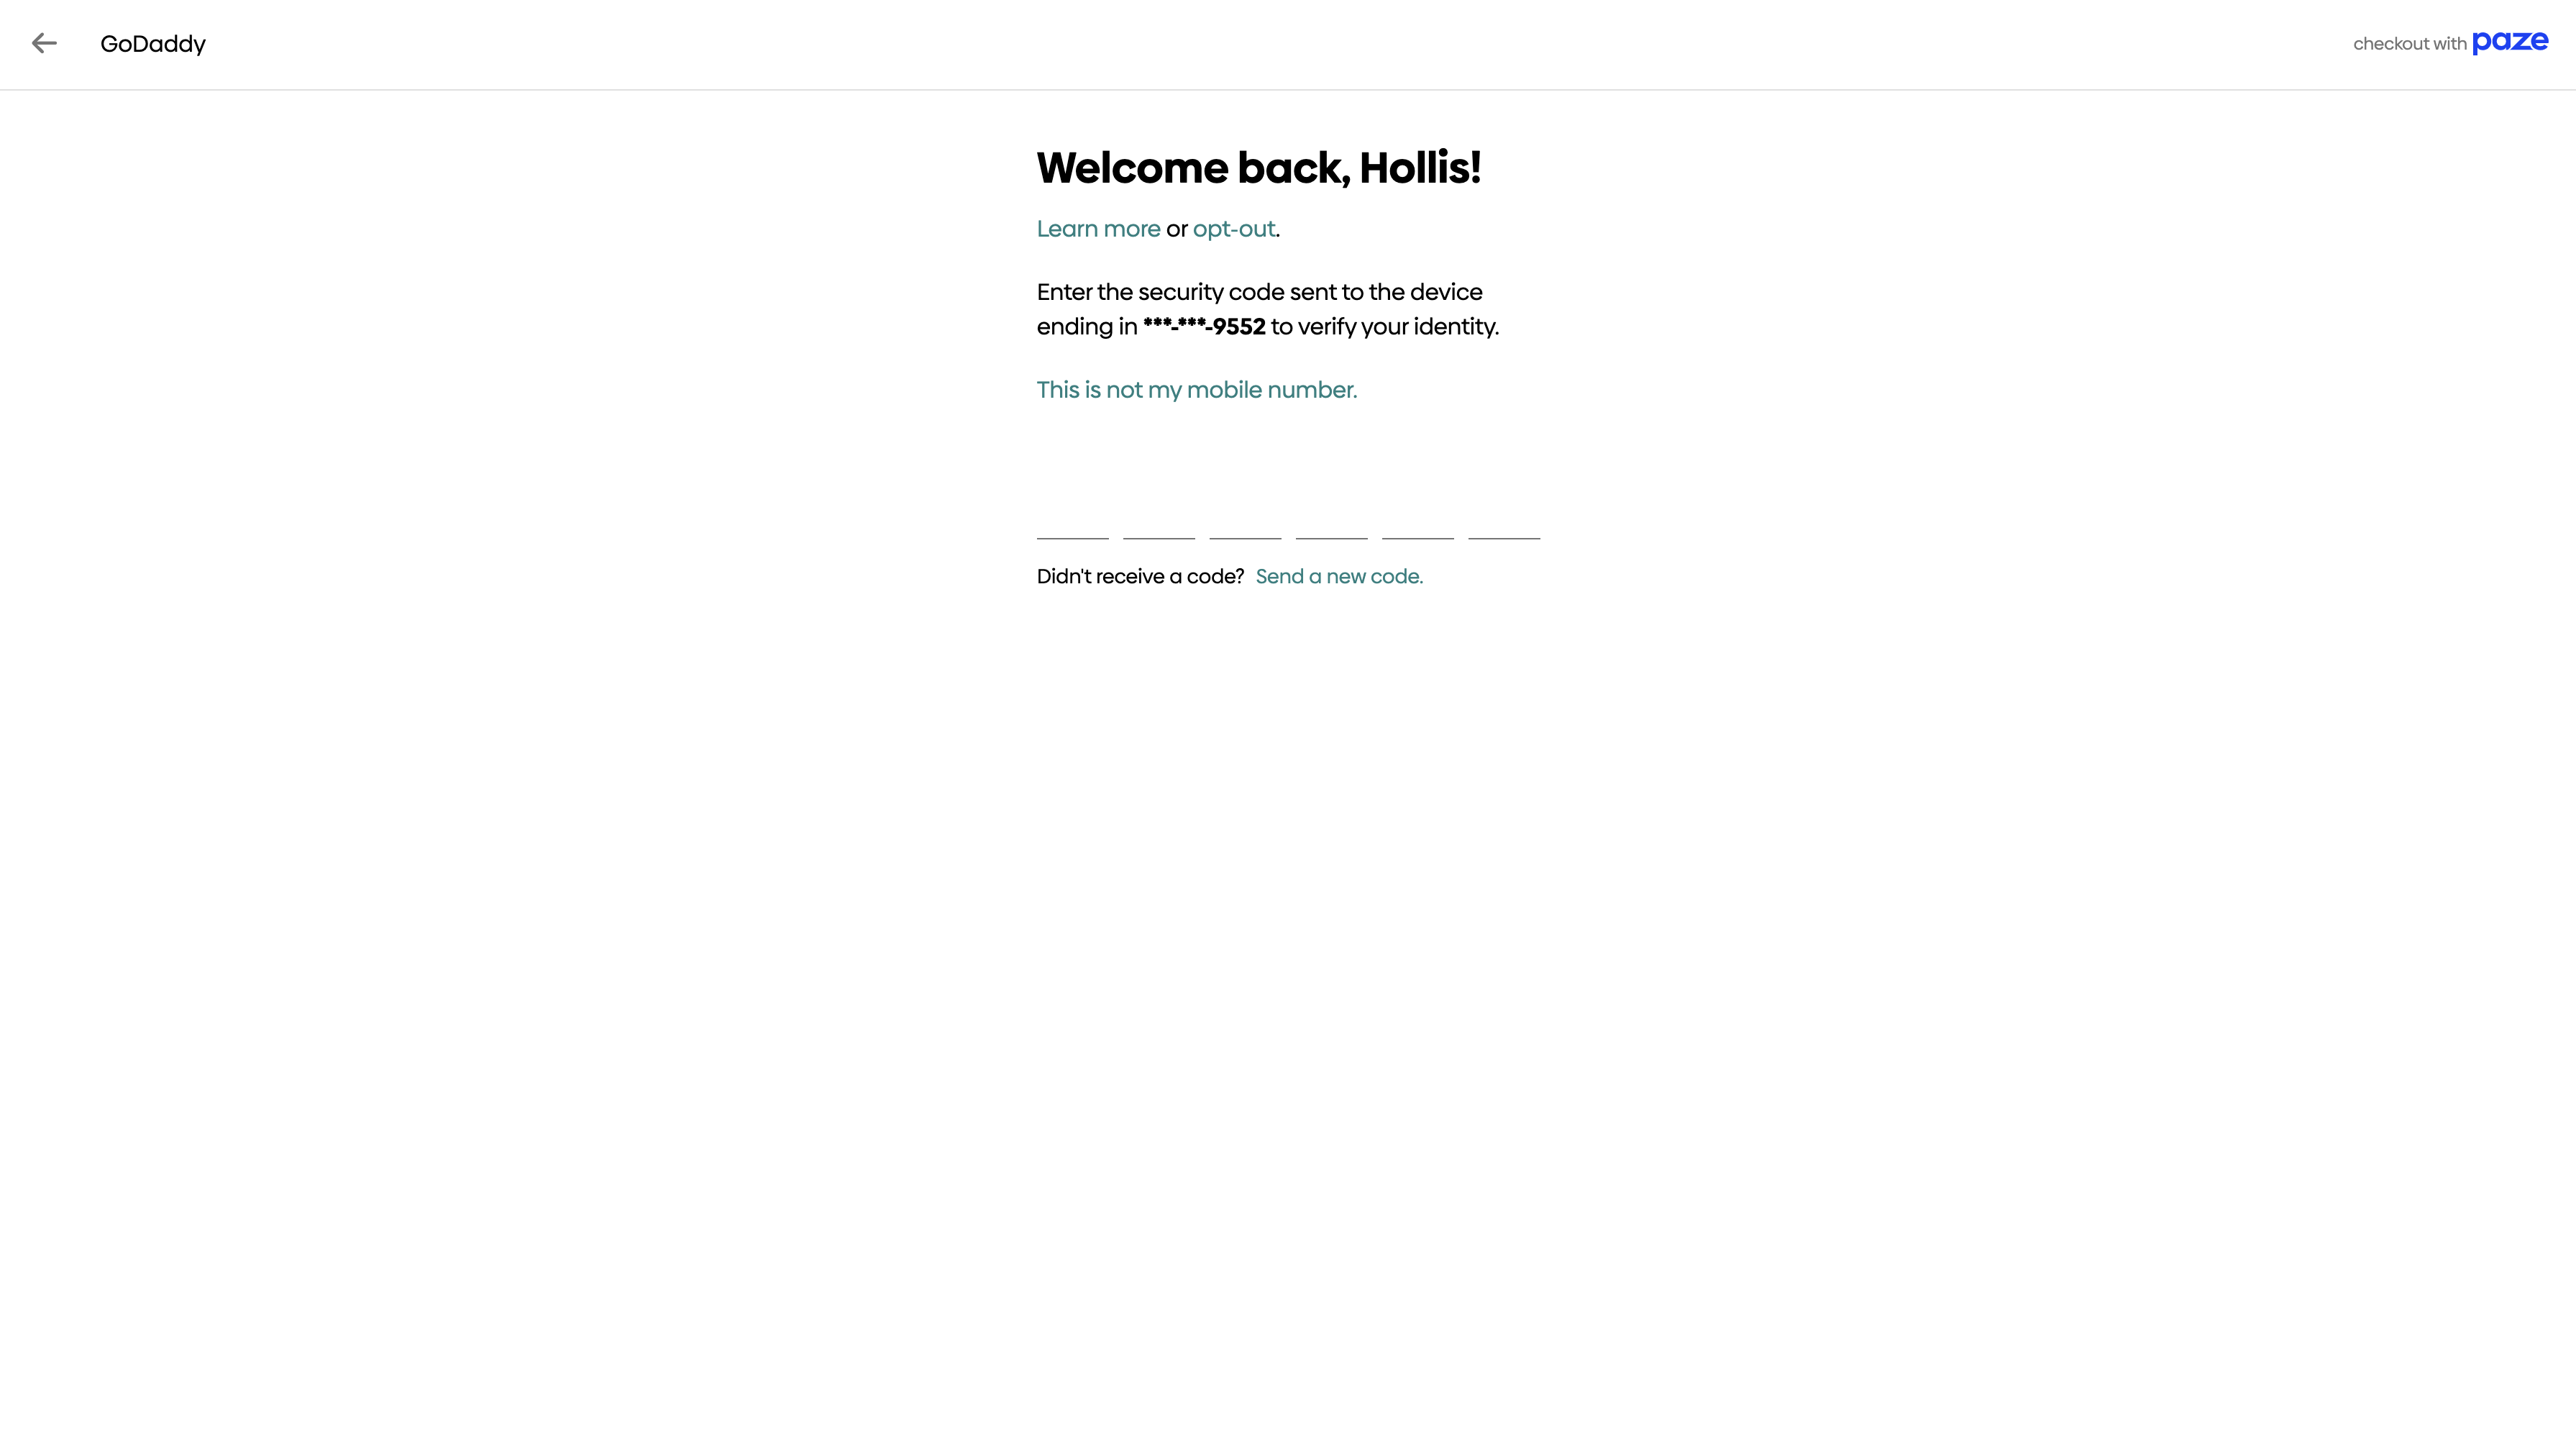
When a customer clicks on the Paze button, a new page controlled by the Paze API will open. The checkout process involves several screens controlled by Paze that the customer needs to complete:
- Email Verification (only shown if you didn't pass an email during the
supportWalletPaymentscall): The customer will be prompted to verify their email address. - SMS Verification: The customer will undergo SMS verification to ensure the security of their transaction.
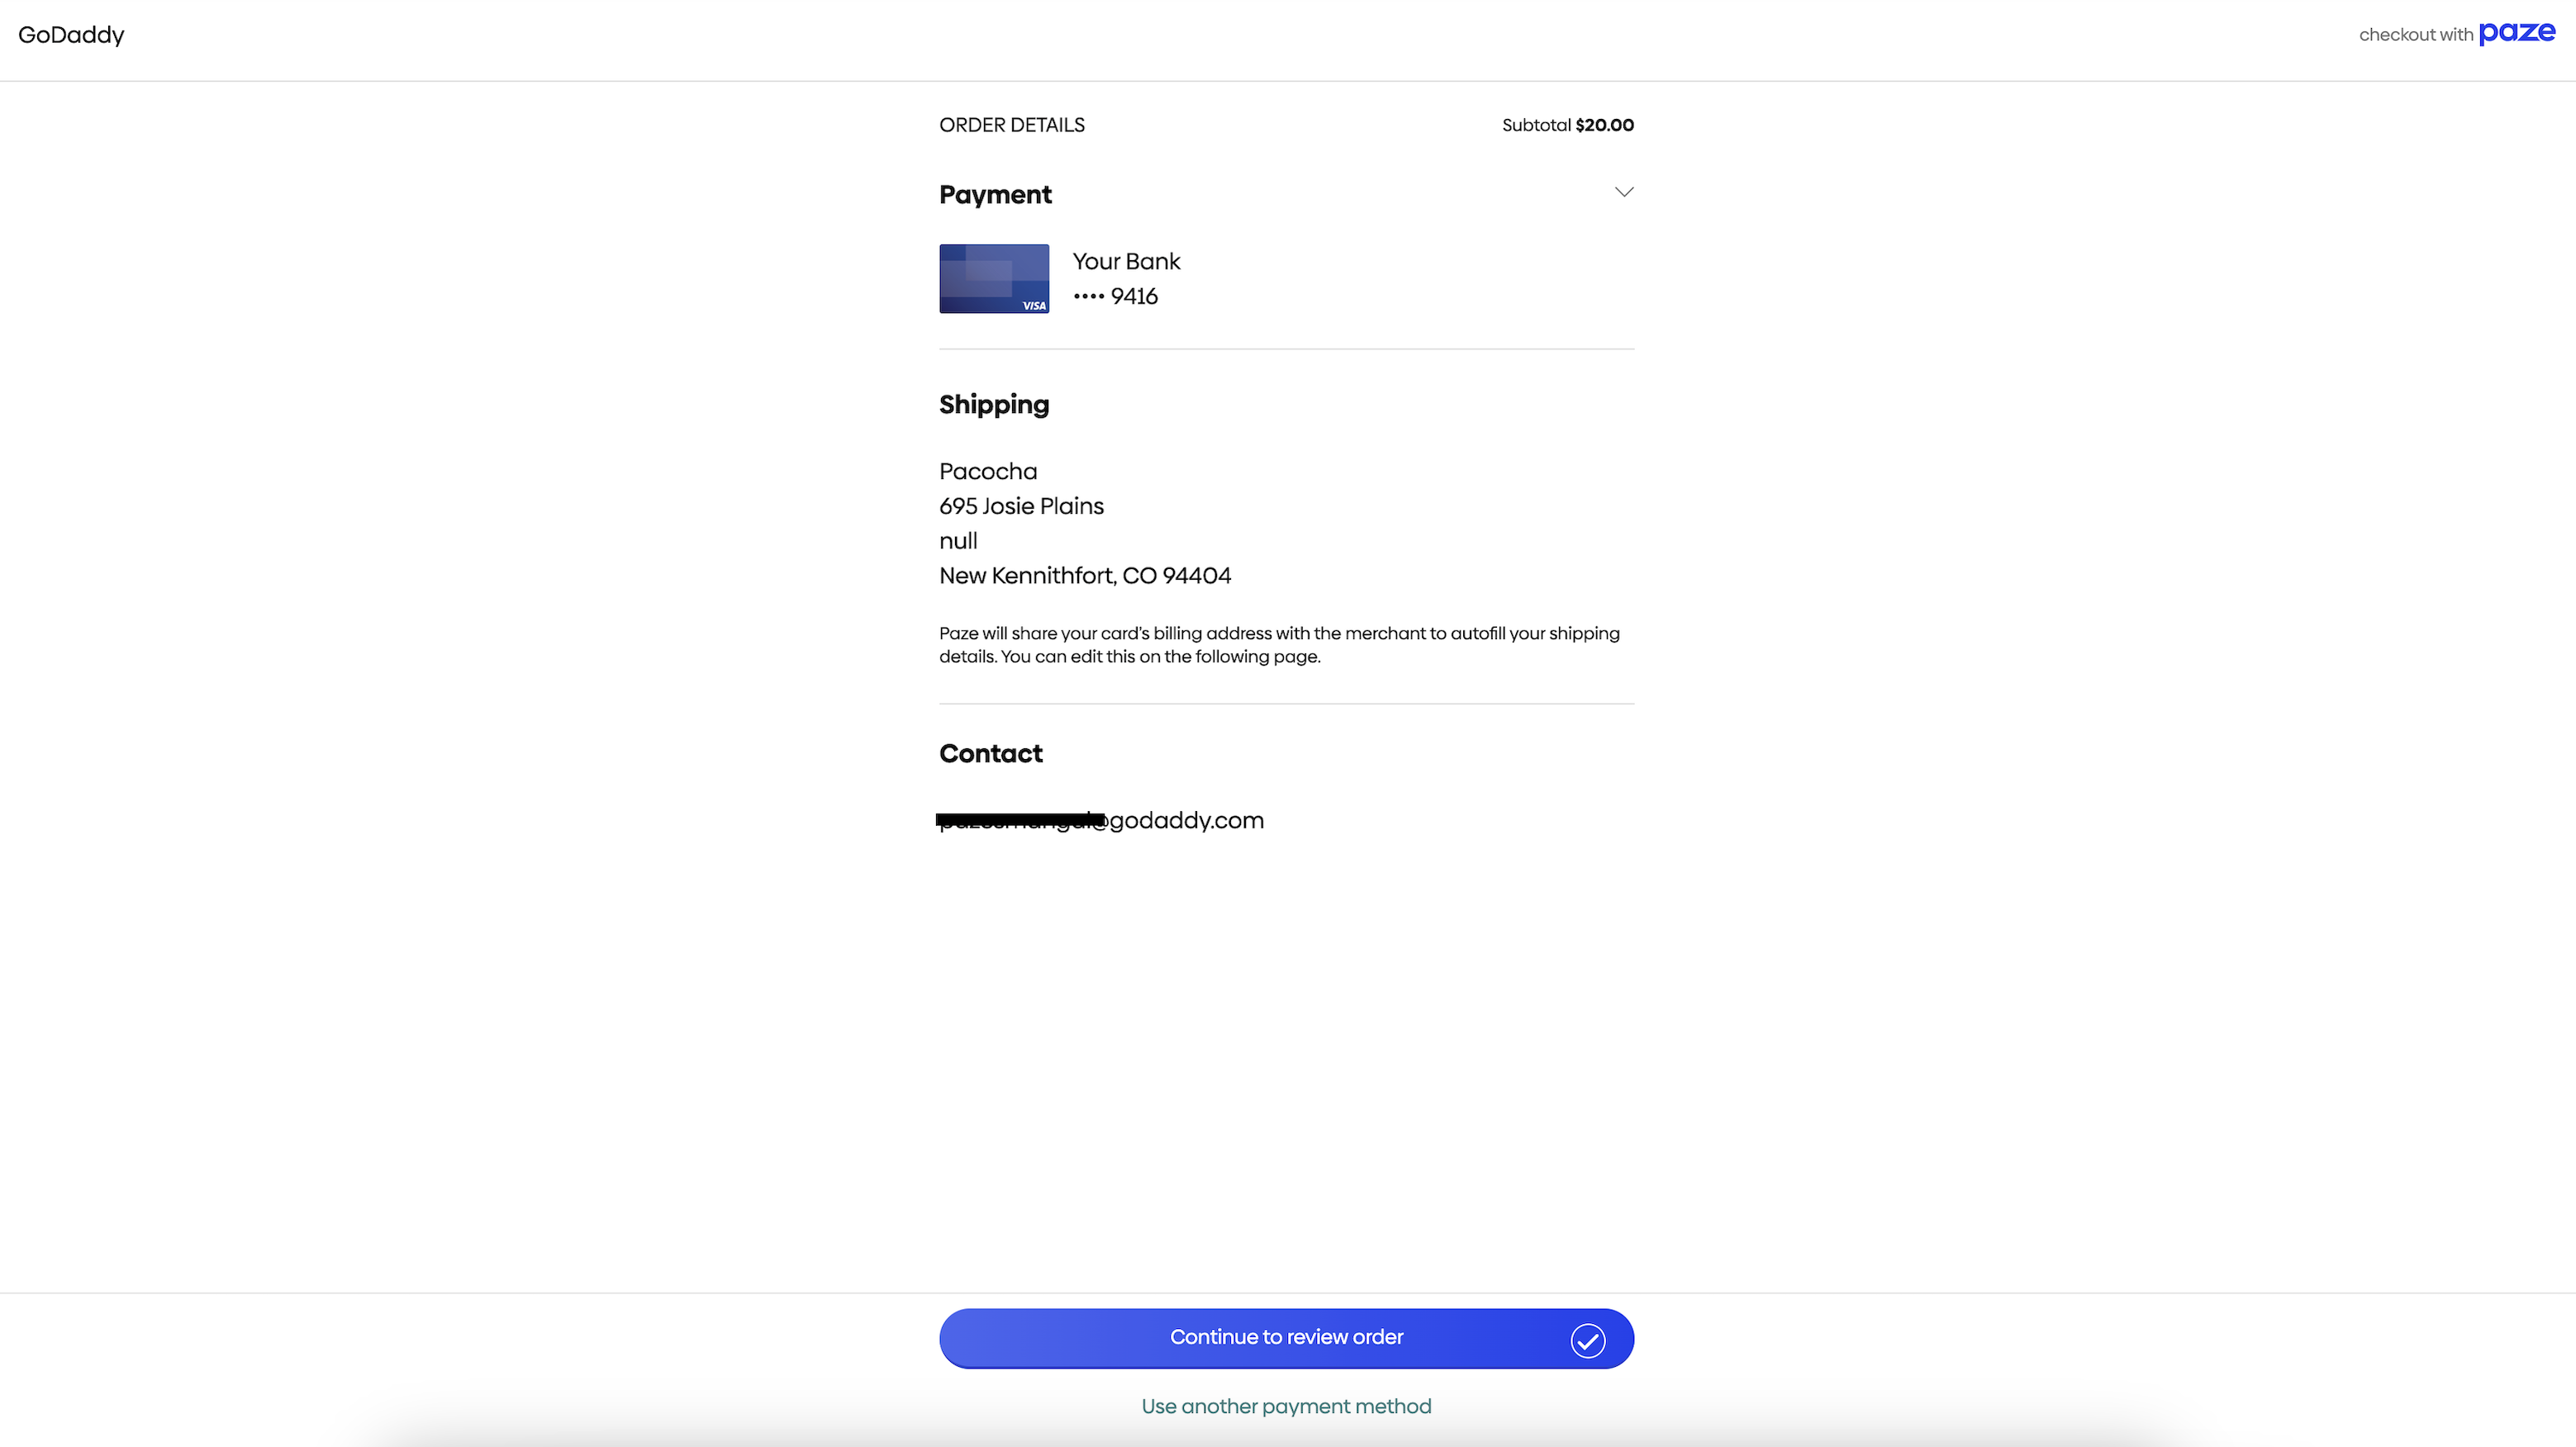
- Checkout: In this stage, the customer can select a preferred payment card and verify the billing and shipping address details.
Please note that these steps are managed by the Paze API, and the customer will be guided through each screen to complete the checkout process seamlessly.
Step 1:
Step 2:
Step 3:
Step 4:
# Obtaining the Payment Nonce
When the customer clicks the "Continue to review order" button, Poynt Collect internally initiate a call to our services to decrypt the Paze payload and generate a nonce, similar to the process used for Apple Pay or Google Pay. Once completed, you will receive the generated nonce and billing address in a payment_authorized event response. To achieve this, you need to add a listener using the collect.on method:
const result = await collect.supportWalletPayments();

if (result.paze) {
  const walletRequest = {
    total: {
      label: "Total",
      amount: "20.00",
    },
    country: "US",
    currency: "USD",
    merchantName: "GoDaddy",
  };

  const collect = new TokenizeJs(
    "<business_id>",
    "<application_id>",
    walletRequest
  );

  collect.on("payment_authorized", async (event) => {
    try {
      // charge nonce via your backend
      await backend.charge(event.nonce);
      event.complete();
    } catch(error) {
      event.complete({ error });
    }
  });
}
NOTE
Make sure to call the event.complete method once the charge process is completed successfully or not.
Please refer to the Payment Sheet Events for more details.
# Processing the Payment Nonce
Please refer to the Charging a Nonce section for more details.
# Integration Code Sample
Use the code below to render a simple Paze button with the Poynt Collect iFrame. You just need to update the following code with your GoDaddy Payments business_id and application_id obtained from step (1):
<html>
  <head>
  </head>
  <body>
    <div id="poynt-collect-iframe"></div>
    <script>
      const iFrame = document.createElement("script");
      iFrame.src = "https://collect.commerce.godaddy.com/sdk.js";
      iFrame.async = true;

      iFrame.onload = () => {
        const walletRequest = {
          total: {
            label: "Total",
            amount: "20.00",
          },
          country: "US",
          currency: "USD",
          merchantName: "GoDaddy",
        };

        const buttonOptions = {
          color: "default",
        };

        const collect = new TokenizeJs(
          "<business_id>",
          "<application_id>",
          walletRequest
        );

        const result = await collect.supportWalletPayments();

        const paymentMethods = [];

        if (result.paze) {
          paymentMethods.push("paze");
        }

        if (paymentMethods.length) {
          collect.mount("poynt-collect-iframe", document, { paymentMethods, buttonOptions });
        }

        collect.on("payment_authorized", async (event) => {
          try {
            // charge nonce via your backend
            await backend.charge(event.nonce);
            event.complete();
          } catch(error) {
            event.complete({ error });
          }
        });
      };

      document.head.appendChild(iFrame);
    </script>
  </body>
</html>
# Testing Setup
Please refer to the Testing Setup for more details.