# Order Ahead
The order Ahead application can be built to work with GoDaddy Poynt in two different ways as shown below
Poynt Register App Integration
Native Order Ahead App Integration
# Register App Integration
An Order Ahead application can be built to work with the on-terminal Poynt Register (opens new window) application. Here are the steps:
- The Merchant authorizes the App
The authorization flow is described within the Poynt Cloud API section. In this particular case, the merchant authorizes access to 'Orders' and 'Customers' resources as shown below.
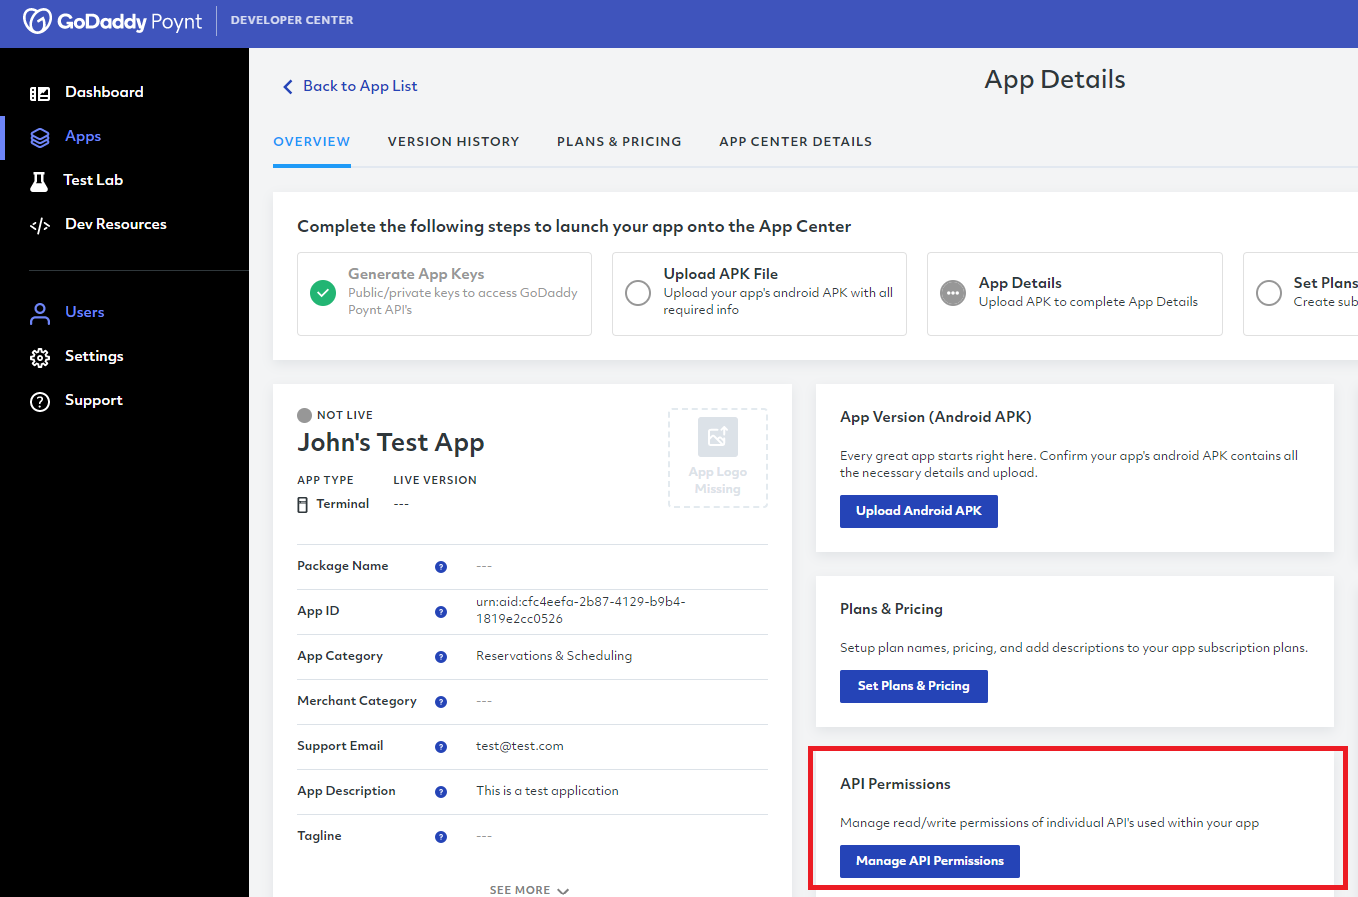
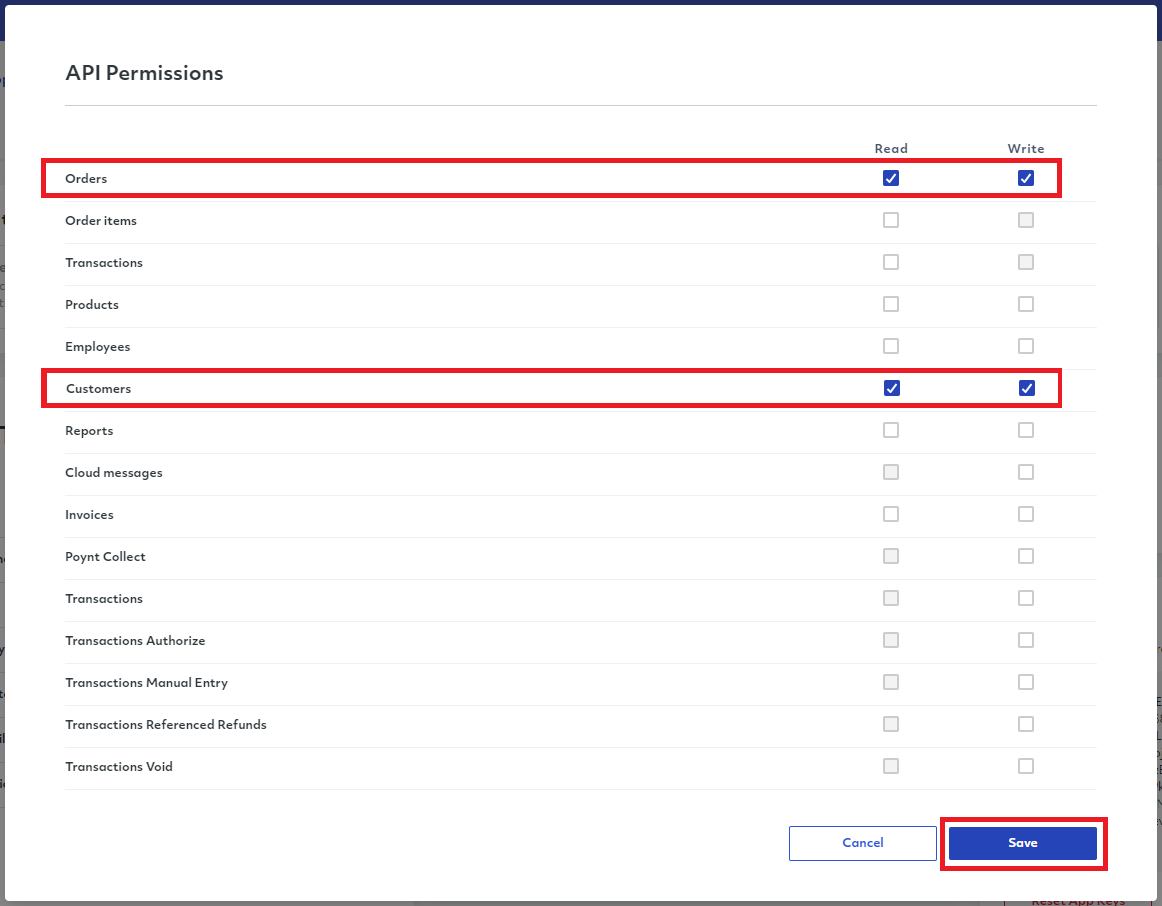
- The merchant completes the web-flow using the Merchant Login URL to grant permissions to the Application
The web flow is further described within Integration with Cloud APIs.
- Create a Customer
Sample Request:
curl -X POST \
  https://services.poynt.net/businesses/{businessId}/customers \
  -H 'Authorization: Bearer <access-token>' \
  -H 'Cache-Control: no-cache' \
  -H 'Content-Type: application/json' \
  -H 'api-version: 1.2' \
  -d '{
            "emails": {
                "PERSONAL": {
                "emailAddress": "satya+test@poynt.com"
                }
            },
            "firstName": "Satya",
            "lastName": "Vedule",
            "attributes": {"imageUrl": "https://bit.ly/2IjahBz"}
        }'
Response:
{
   "businessPreferences":{

   },
   "id":45494460,
   "emails":{
      "PERSONAL":{
         "primary":False,
         "createdAt":"2018-06-20T20:58:15Z",
         "updatedAt":"2018-06-20T20:58:15Z",
         "status":"ADDED",
         "type":"PERSONAL",
         "id":939970,
         "emailAddress":"satya+test1@poynt.com"
      }
   },
   "attributes":{
      "imageUrl":"https://bit.ly/2IjahBz"
   },
   "firstName":"Satya",
   "lastName":"Vedule",
   "businessId":"{businessId}"
}
The id value (in this case 45494460) corresponds to the customerId. This value can be passed to the Order to display the customer details.
- Create an Order
Sample Request:
curl -X POST \
  https://services.poynt.net/businesses/{businessId}/orders \
  -H 'Authorization: Bearer <access-token>' \
  -H 'Cache-Control: no-cache' \
  -H 'Content-Type: application/json' \
  -H 'api-version: 1.2' \
  -d '{
   "items":[
      {
         "status":"ORDERED",
         "fulfillmentInstruction":"PICKUP_INSTORE",
         "clientNotes":"to be picked from store# 121",
         "code":"Cr",
         "name":"Croissant",
         "unitOfMeasure":"EACH",
         "popular":true,
         "unitPrice":195,
         "tax":32,
         "quantity":2.0
      }
   ],
   "amounts": {
      "taxTotal":32,
      "discountTotal":0,
      "subTotal":390,
      "currency":"USD"
   },
   "context": {
      "source":"WEB",
      "transactionInstruction":"EXTERNALLY_PROCESSED",
      "businessId":"{businessId}", 			                               // businessId of the merchant
      "storeId":"{storeId}",				                               // storeId of the business
      "storeDeviceId":"{appId}"	                                           // AppId of the developer app
   },
   "customerUserId": 45494460,			                                   //customerId from the Create Customer call.
   "statuses": {
      "status":"OPENED"
   }
}'
Order Object Request Response:
{
    "createdAt": "2018-06-22T19:45:41Z",
    "updatedAt": "2018-06-22T19:45:41Z",
    "context": {
        "employeeUserId": 0,
        "storeDeviceId": "{appId}",
        "transactionInstruction": "EXTERNALLY_PROCESSED",
        "source": "WEB",
        "businessId": "{businessId}",
        "storeId": "{storeId}"
    },
    "items": [
        {
            "createdAt": "2018-06-22T19:45:41Z",
            "updatedAt": "2018-06-22T19:45:41Z",
            "quantity": 2,
            "fulfillmentInstruction": "PICKUP_INSTORE",
            "id": 1,
            "unitPrice": 195,
            "discount": 0,
            "fee": 0,
            "tax": 32,
            "status": "FULFILLED",
            "name": "Croissant",
            "clientNotes": "to be picked from store# 121",
            "unitOfMeasure": "EACH"
        }
    ],
    "customerUserId": 45494460,
    "amounts": {
        "subTotal": 390,
        "discountTotal": 0,
        "taxTotal": 32,
        "netTotal": 422,
        "currency": "USD"
    },
    "statuses": {
        "fulfillmentStatus": "FULFILLED",
        "status": "OPENED",
        "transactionStatusSummary": "EXTERNALLY_PROCESSED"
    },
    "id": "xxxxxxx"
}
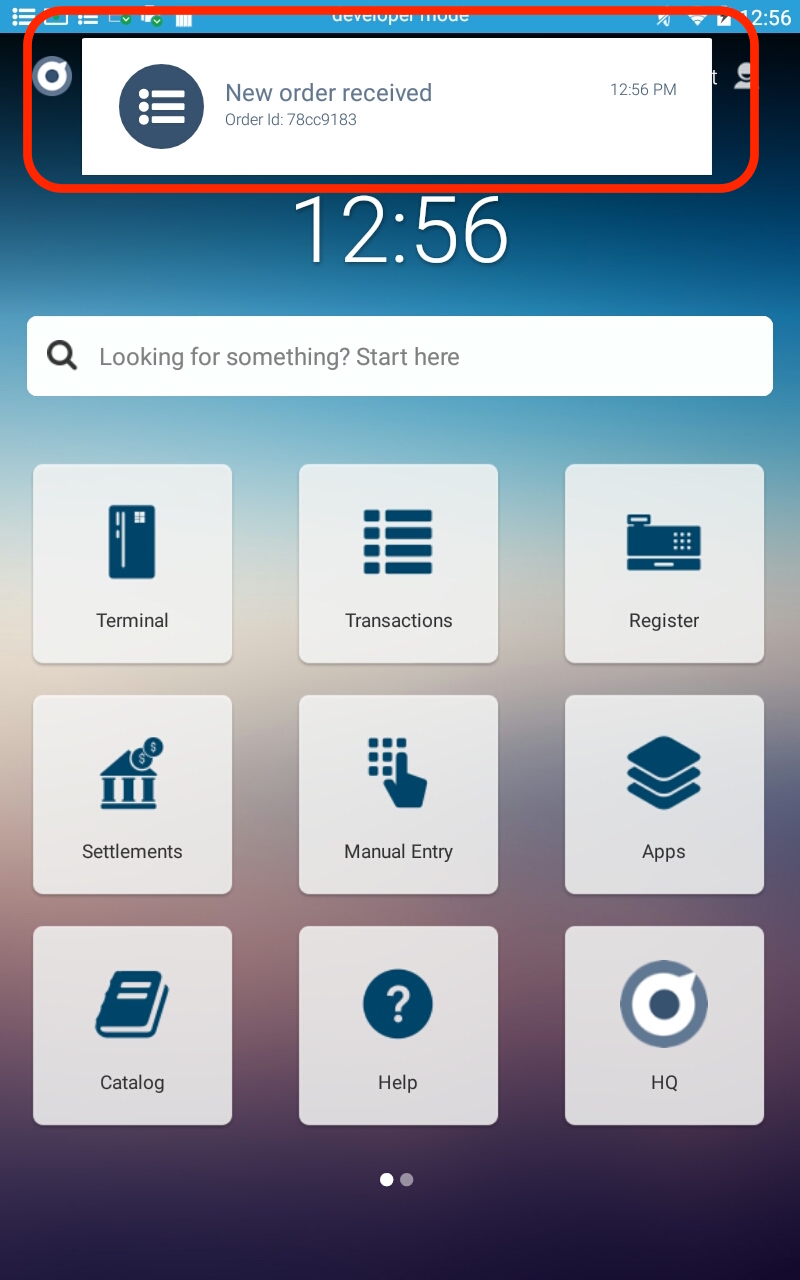
At this point, the order has been successfully created.
A Poynt Cloud Message is sent to the terminal for the newly created order.
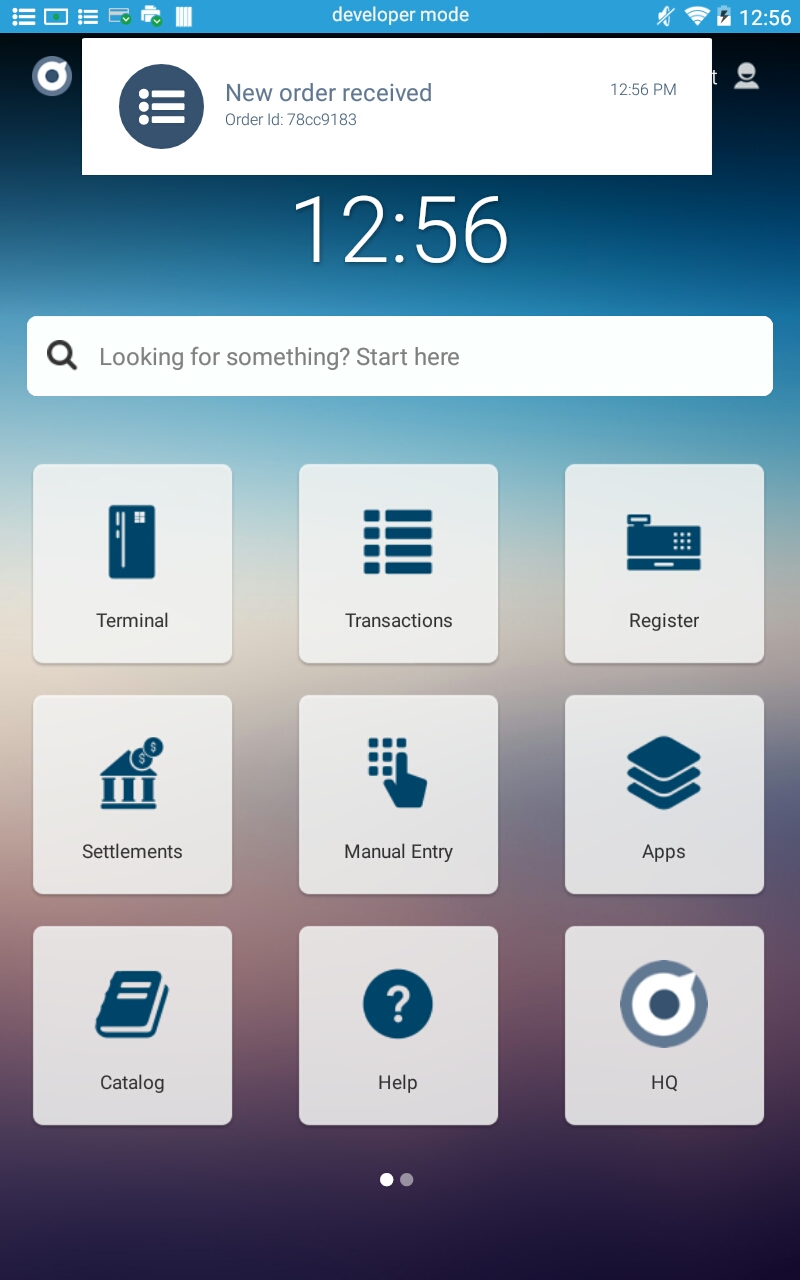
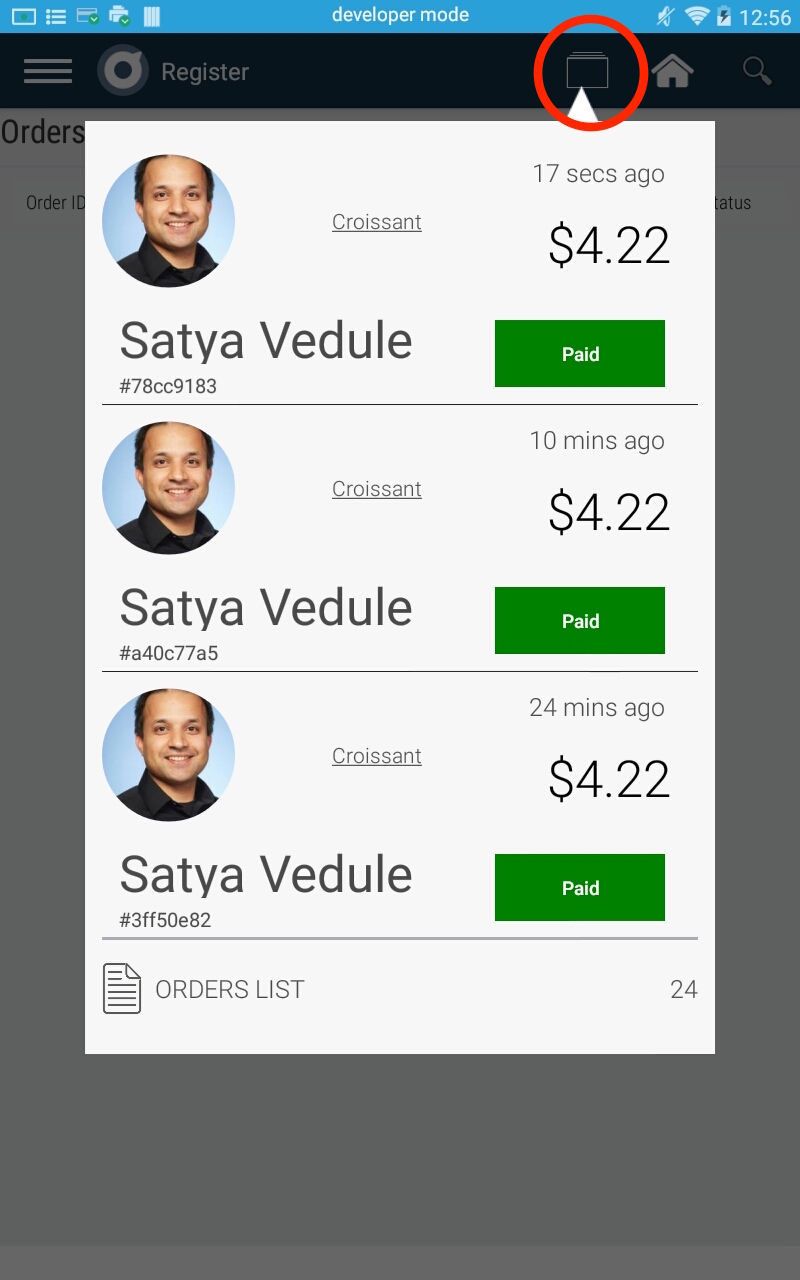
The order can be viewed from Order Inbox in the Register app.
# Native App Integration
A Native Order Ahead application can be built to work with GoDaddy Poynt. Below are the steps detailing this process.
- Implicit Authorization
The following permissions should be included in the Android App manifest:
Order Service: poynt.permission.ORDER_SERVICE
Customer Service: poynt.permission.CUSTOMER_SERVICE
When a merchant subscribes to the App, these permissions are implicitly granted to the application.
- Create Customer and Create Order
Create a Customer followed by an Order as described in the previous article of Order ahead integration using Register app(Steps 3 and 4).
- Register to listen to order details intent in your app's activity
When the user taps on the Order Notification on the terminal, the Intents.ACTION_GO_TO_ORDER_DETAILS can be handled to create a Custom Order Details view in your app.