# Cloud Messaging
# General Overview
Poynt Cloud Messages (PCM) is GoDaddy Poynt's solution to send push notifications from the cloud to the applications running on the GoDaddy Poynt Smart Terminal with minimal effort.
This article will explain the various components of PCM and describe how developers can send messages through PCM to their applications.
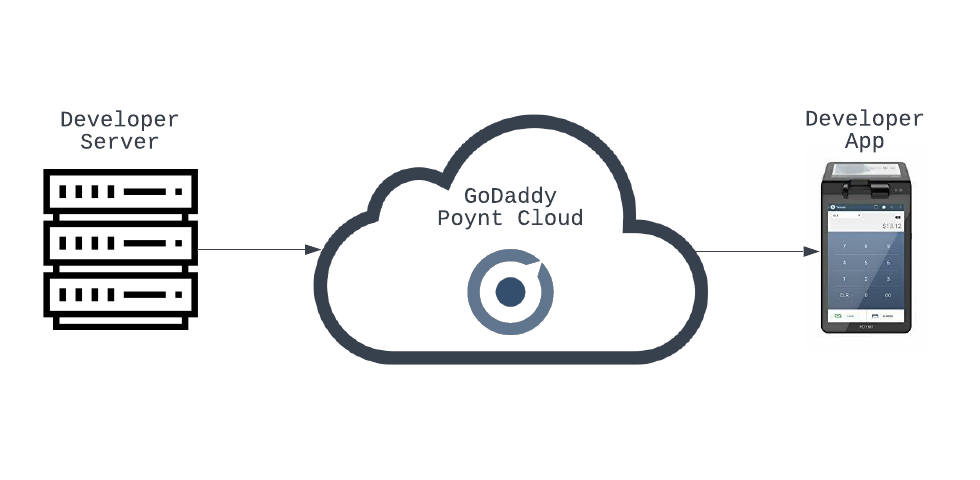
Developers will need to build two components:
A sending application that interacts with the PCM REST API.
An Android application running on the Smart Terminal.
# Prerequisites
Proficiency in Python
Proficiency in Android
# Sending Messages
To send a message through PCM, you will need two sets of information:
- The businessId + storeId of where you want to send your message
NOTE
Your application running on the terminal can get the storeId by making a IPoyntBusinessService.getBusiness call. You can refer to this example for more information.
- Your terminal application's package and the class name of the broadcast receiver that will be listening for the message.
To do this, you must create a simple Python application that will POST the message to Poynt. This implementation is based on the Python Example (opens new window).
Please remember to fork/clone it. We will need to modify it for this exercise.
Clone the repository and edit the src/PoyntAPI.py file. Add the following function to the PoyntAPI class:
def sendCloudMessage(self, businessId, storeId, deviceId, packageName, className, data):
    pcmUrl = self.apiHost + "/cloudMessages"
    cloudMessage = {
        "businessId": businessId,
        "storeId": storeId,
        "deviceId": deviceId,
        "ttl": 500,
        "recipient": {
            "className": className,
            "packageName": packageName
        },
        "data": data
    }
    code, jsonObj = self._sendPostRequest(pcmUrl, json.dumps(cloudMessage), {}, {})
    if code == requests.codes.accepted:
        print "Successfully sent cloud message."
Then in the main function near the end of the file, add the line after teh poyntAPI.getAccessToken() call:
poyntAPI.sendCloudMessage(BUSINESS_ID, STORE_ID, "com.my.android.package", "com.my.android.package.MyBroadcastReceiverClass",
"Hello from the cloud.")
TIP
For easier debugging, you can remove other lines inside the if block under the poyntAPI.getAccessToken() call)
This will cause the message to be routed to the com.my.android.package.MyBroadcastReceiverClass class in your terminal application.
After this, you can test your Python code by executing python src/PoyntAPI.py.
# Receiving Messages
In order to receive messages, your terminal application must have a broadcast receiver created with the matching package/class name as specified in the previous section.
Additionally, your receiver must be registered with the correct intent and category. To do this, add your receiver to your application in your AndroidManifest.xml file:
<receiver android:name="com.my.android.package.MyBroadcastReceiver"
          android:enabled="true"
          android:exported="true">
    <intent-filter>
        <action android:name="poynt.intent.action.CLOUD_MESSAGE_RECEIVED" />
        <category android:name="poynt.category.CLOUD_MESSAGE" />
    </intent-filter>
</receiver>
Your broadcast receiver class should look something like the block below:
public class MyBroadcastReceiver extends BroadcastReceiver {
    public MyBroadcastReceiver() {}
    @Override
    public void onReceive(Context context, Intent intent) {
        Log.d("MyBroadcastReceiver", "Got cloud Message: " + intent.getStringExtra(Intents
            .INTENT_EXTRA_CLOUD_MESSAGE_BODY));
    }
}
The message sent from the cloud will be put in the intent extra named INTENT_EXTRA_CLOUD_MESSAGE_BODY. Compile and redeploy your Android application with the receiver above.
After, you must re-run the python example from the previous step. You should see that your receiver printed out the message you sent.