 Documentation
 # POS Bridge - Postman Collection Setup
In an effort to simplify the integration and development processes, we have put together a collection that can be used to test each of the POS Bridge endpoints, providing a broader view into each call and response.
To begin using this collection, you must download each of the .json files below and import them into Postman.
Once you have downloaded the content of both collections into a .json file, you must import them into their corresponding sections within Postman following the steps outlined below:
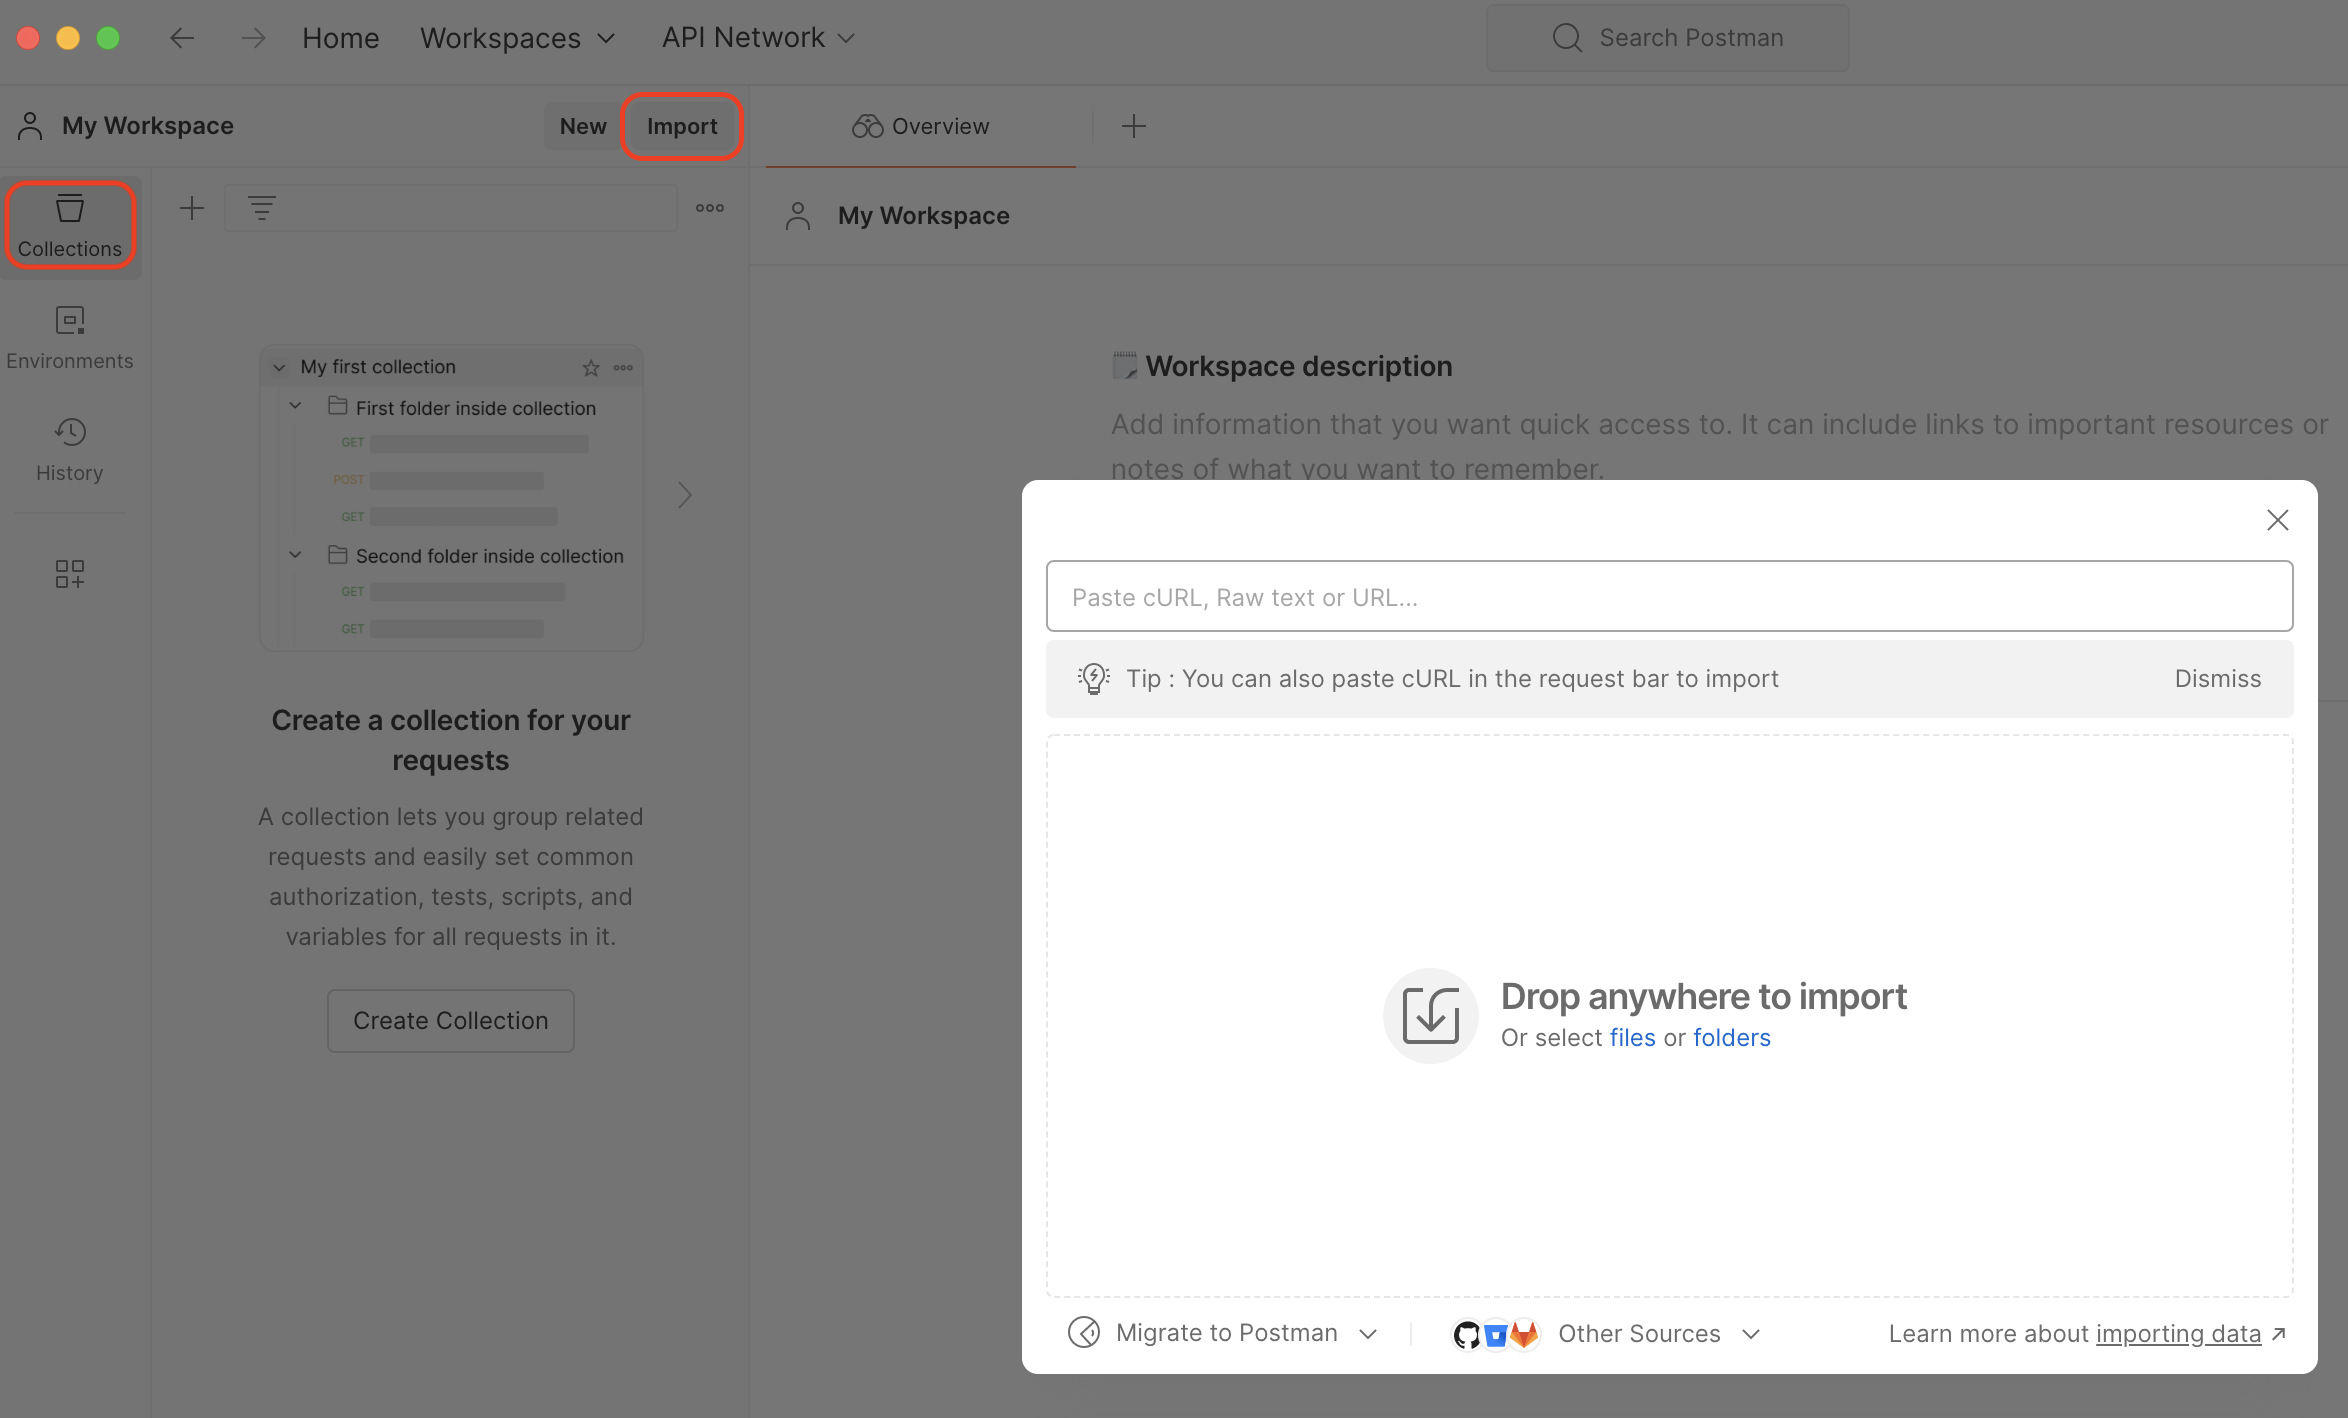
- Go to the Collections section and click Import to bring the endpoint collection from your downloads folder.
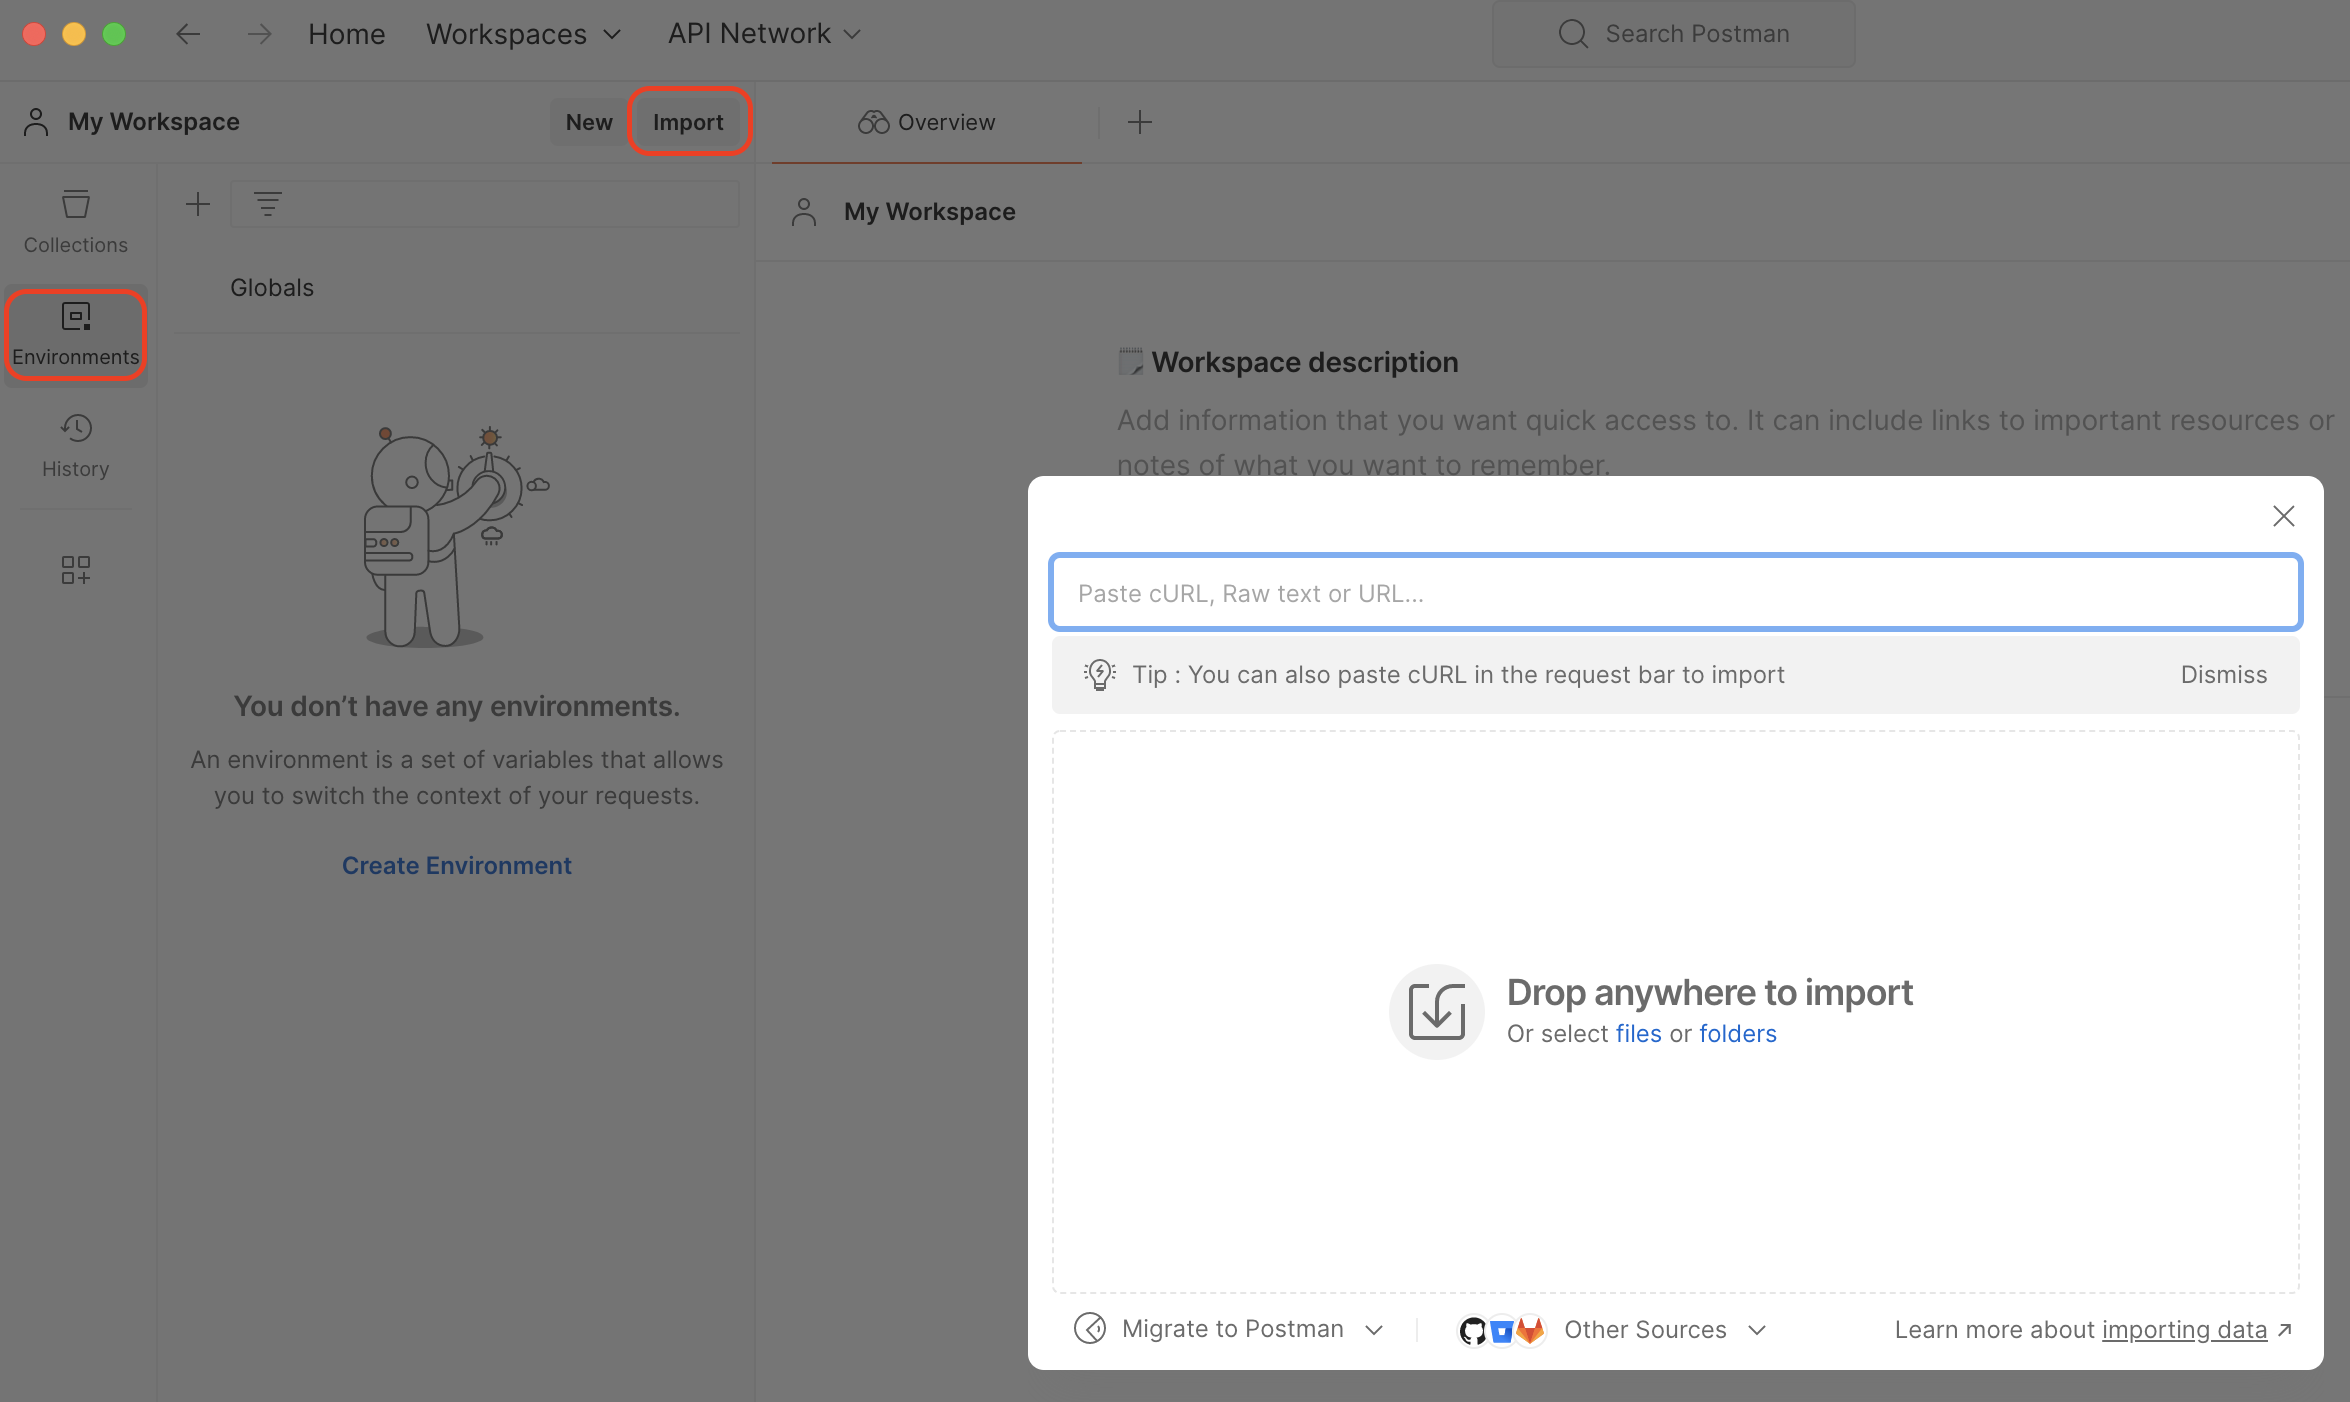
- Go to the Environments section and click Import to import the environment setup.
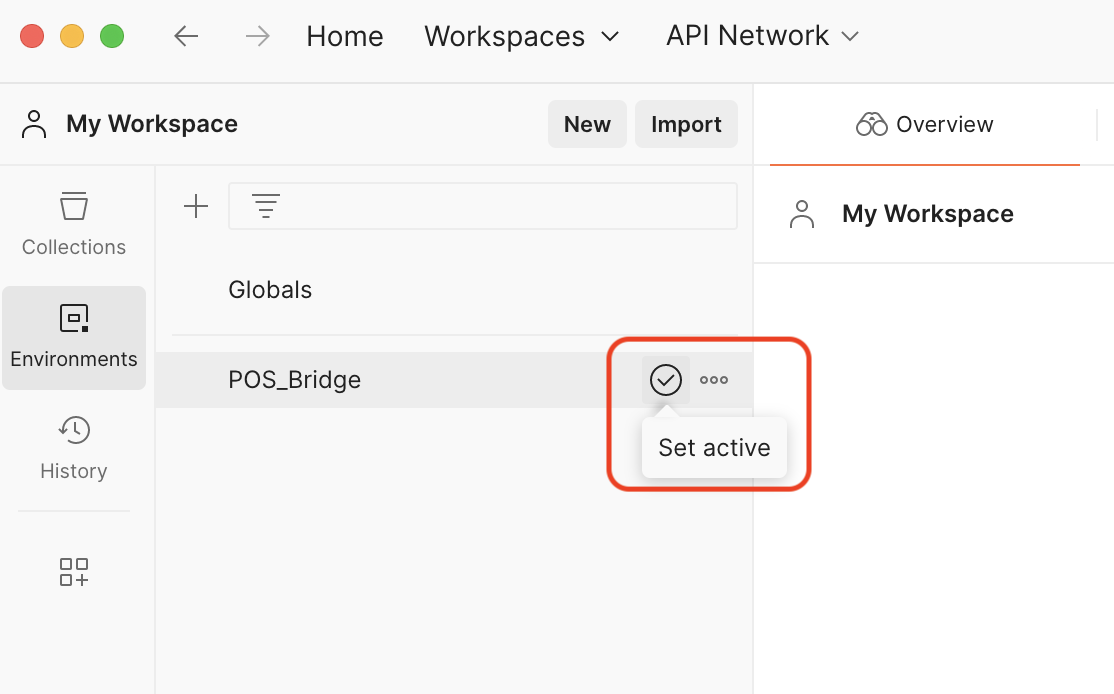
- Activate the environment setup by clicking the arrow check and select it as the session environment in top right corner.
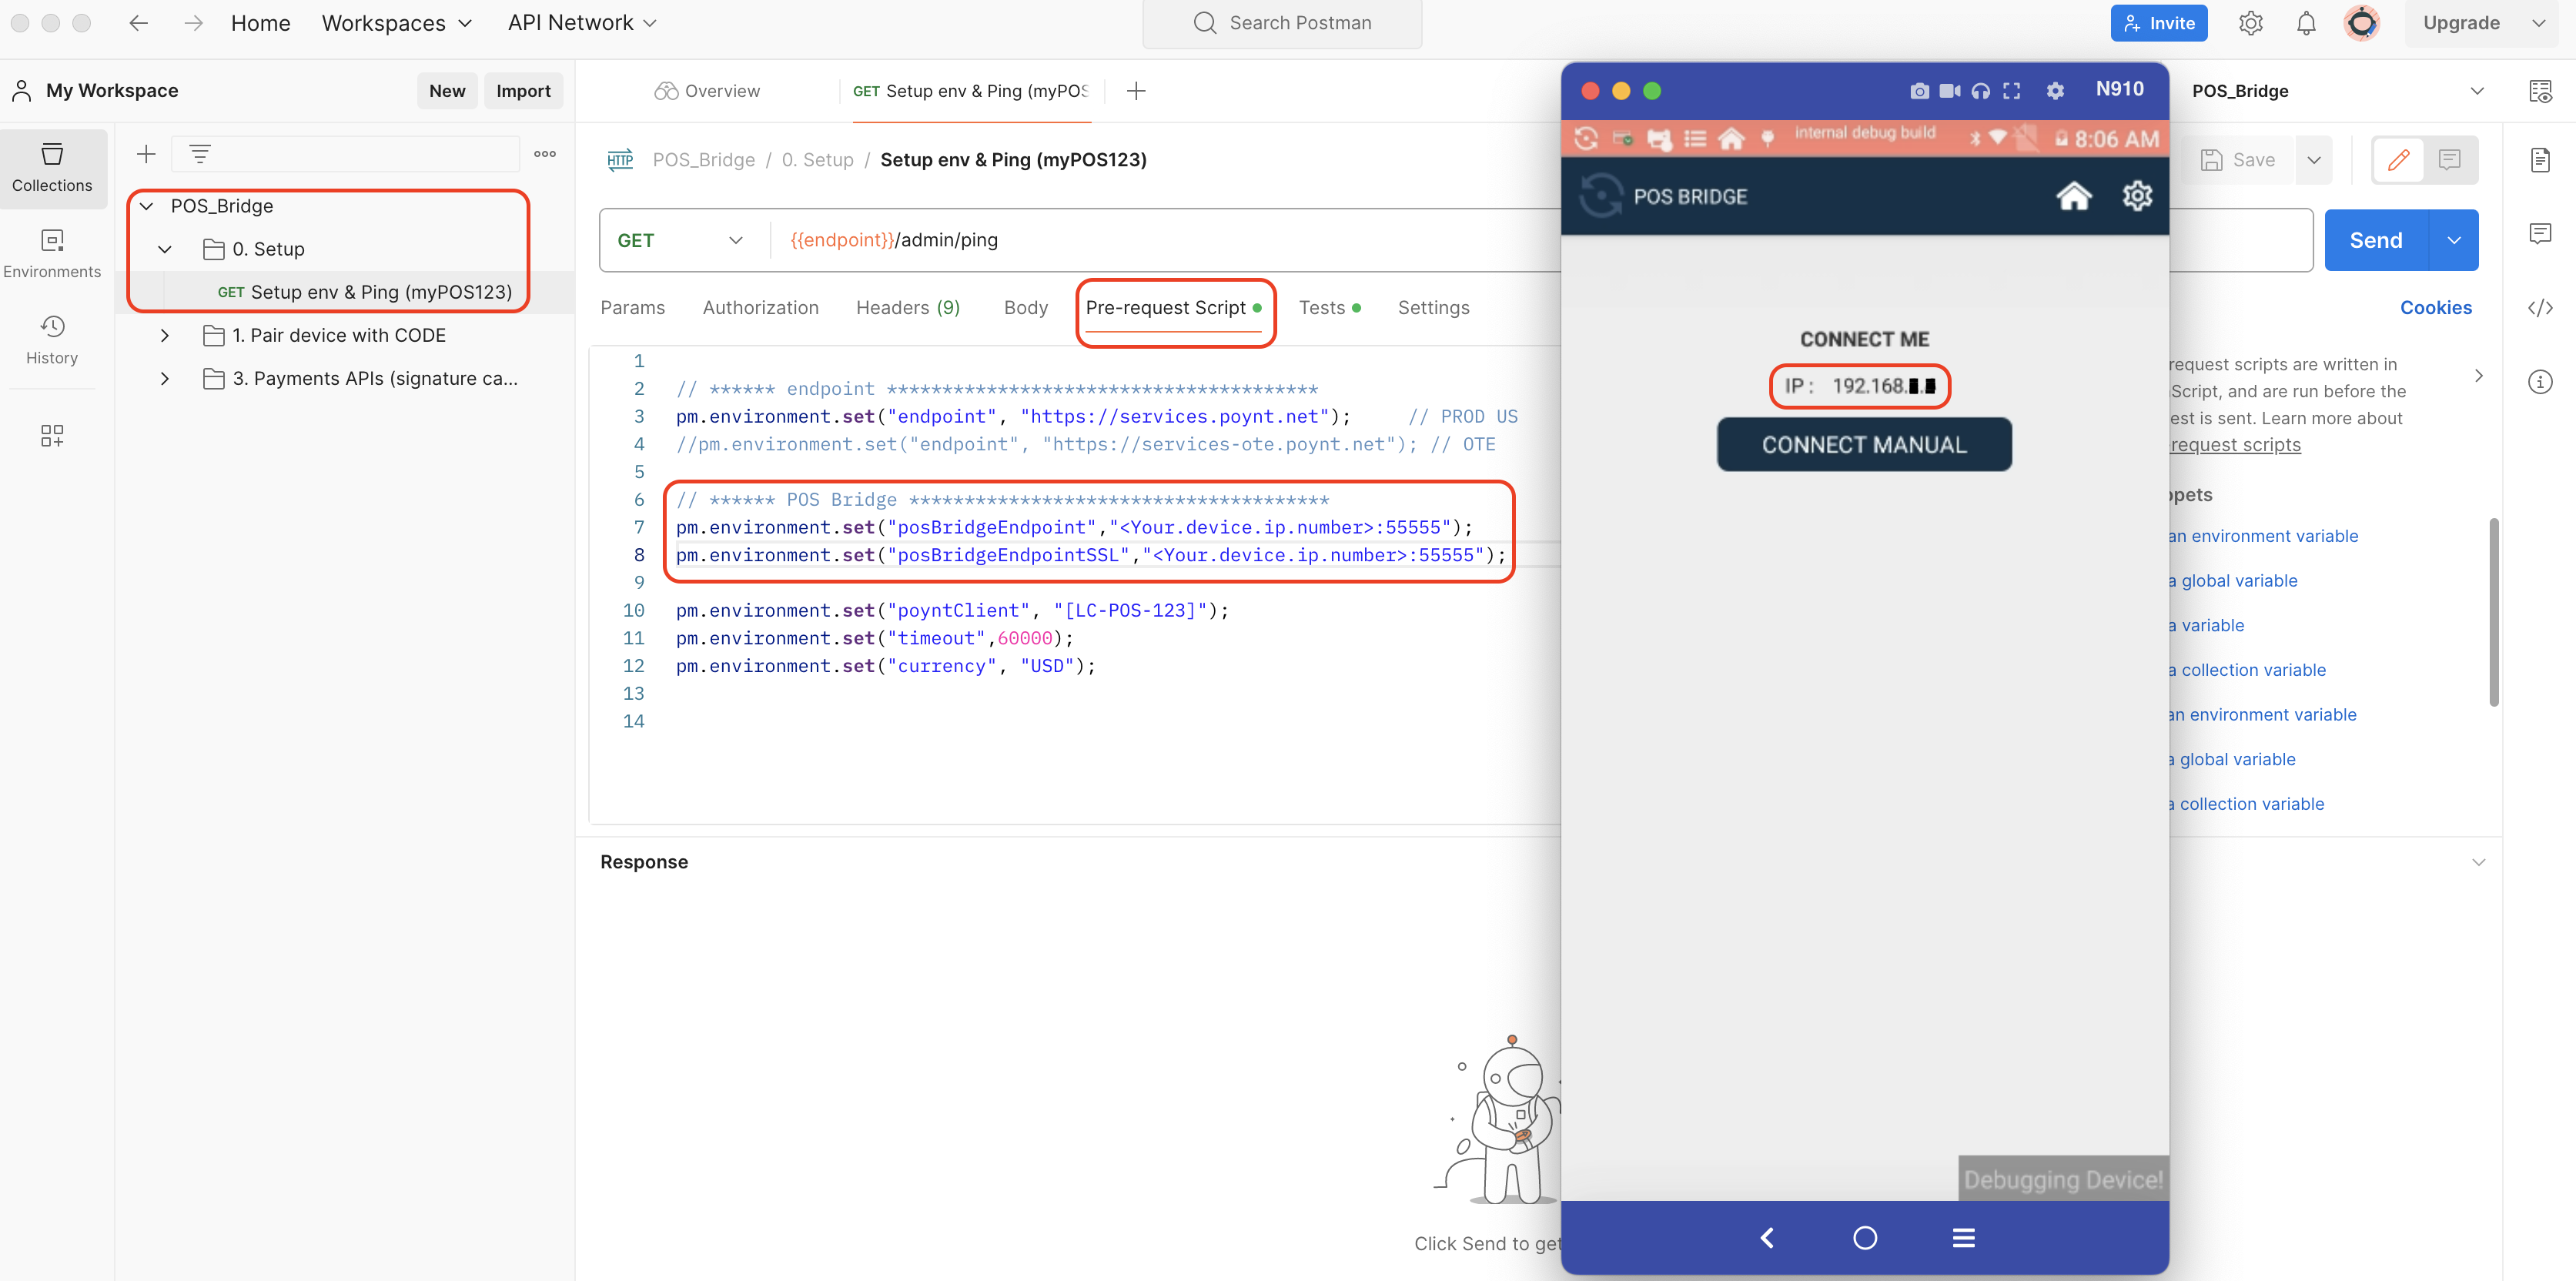
Go to the pre-request script found on the setup folder in the endpoint collection and set the
posBridgeEndpointvariable to the IP value that you see on your device or emulator when you open the POS Bridge application.Back on Postman, you can try sending the first GET call on the setup folder to set up the environment and ping the device. You should get a 200 OK response with no body
NOTE
This call will set your IP address as the value for the posBridgeEndpoint variable on the POS_Bridge environment.

After initiating, you must click the CONNECT MANUALLY button on your device.
You will see a code in your screen, which you must input as the paircode in the pre-request script of the pair device endpoint.
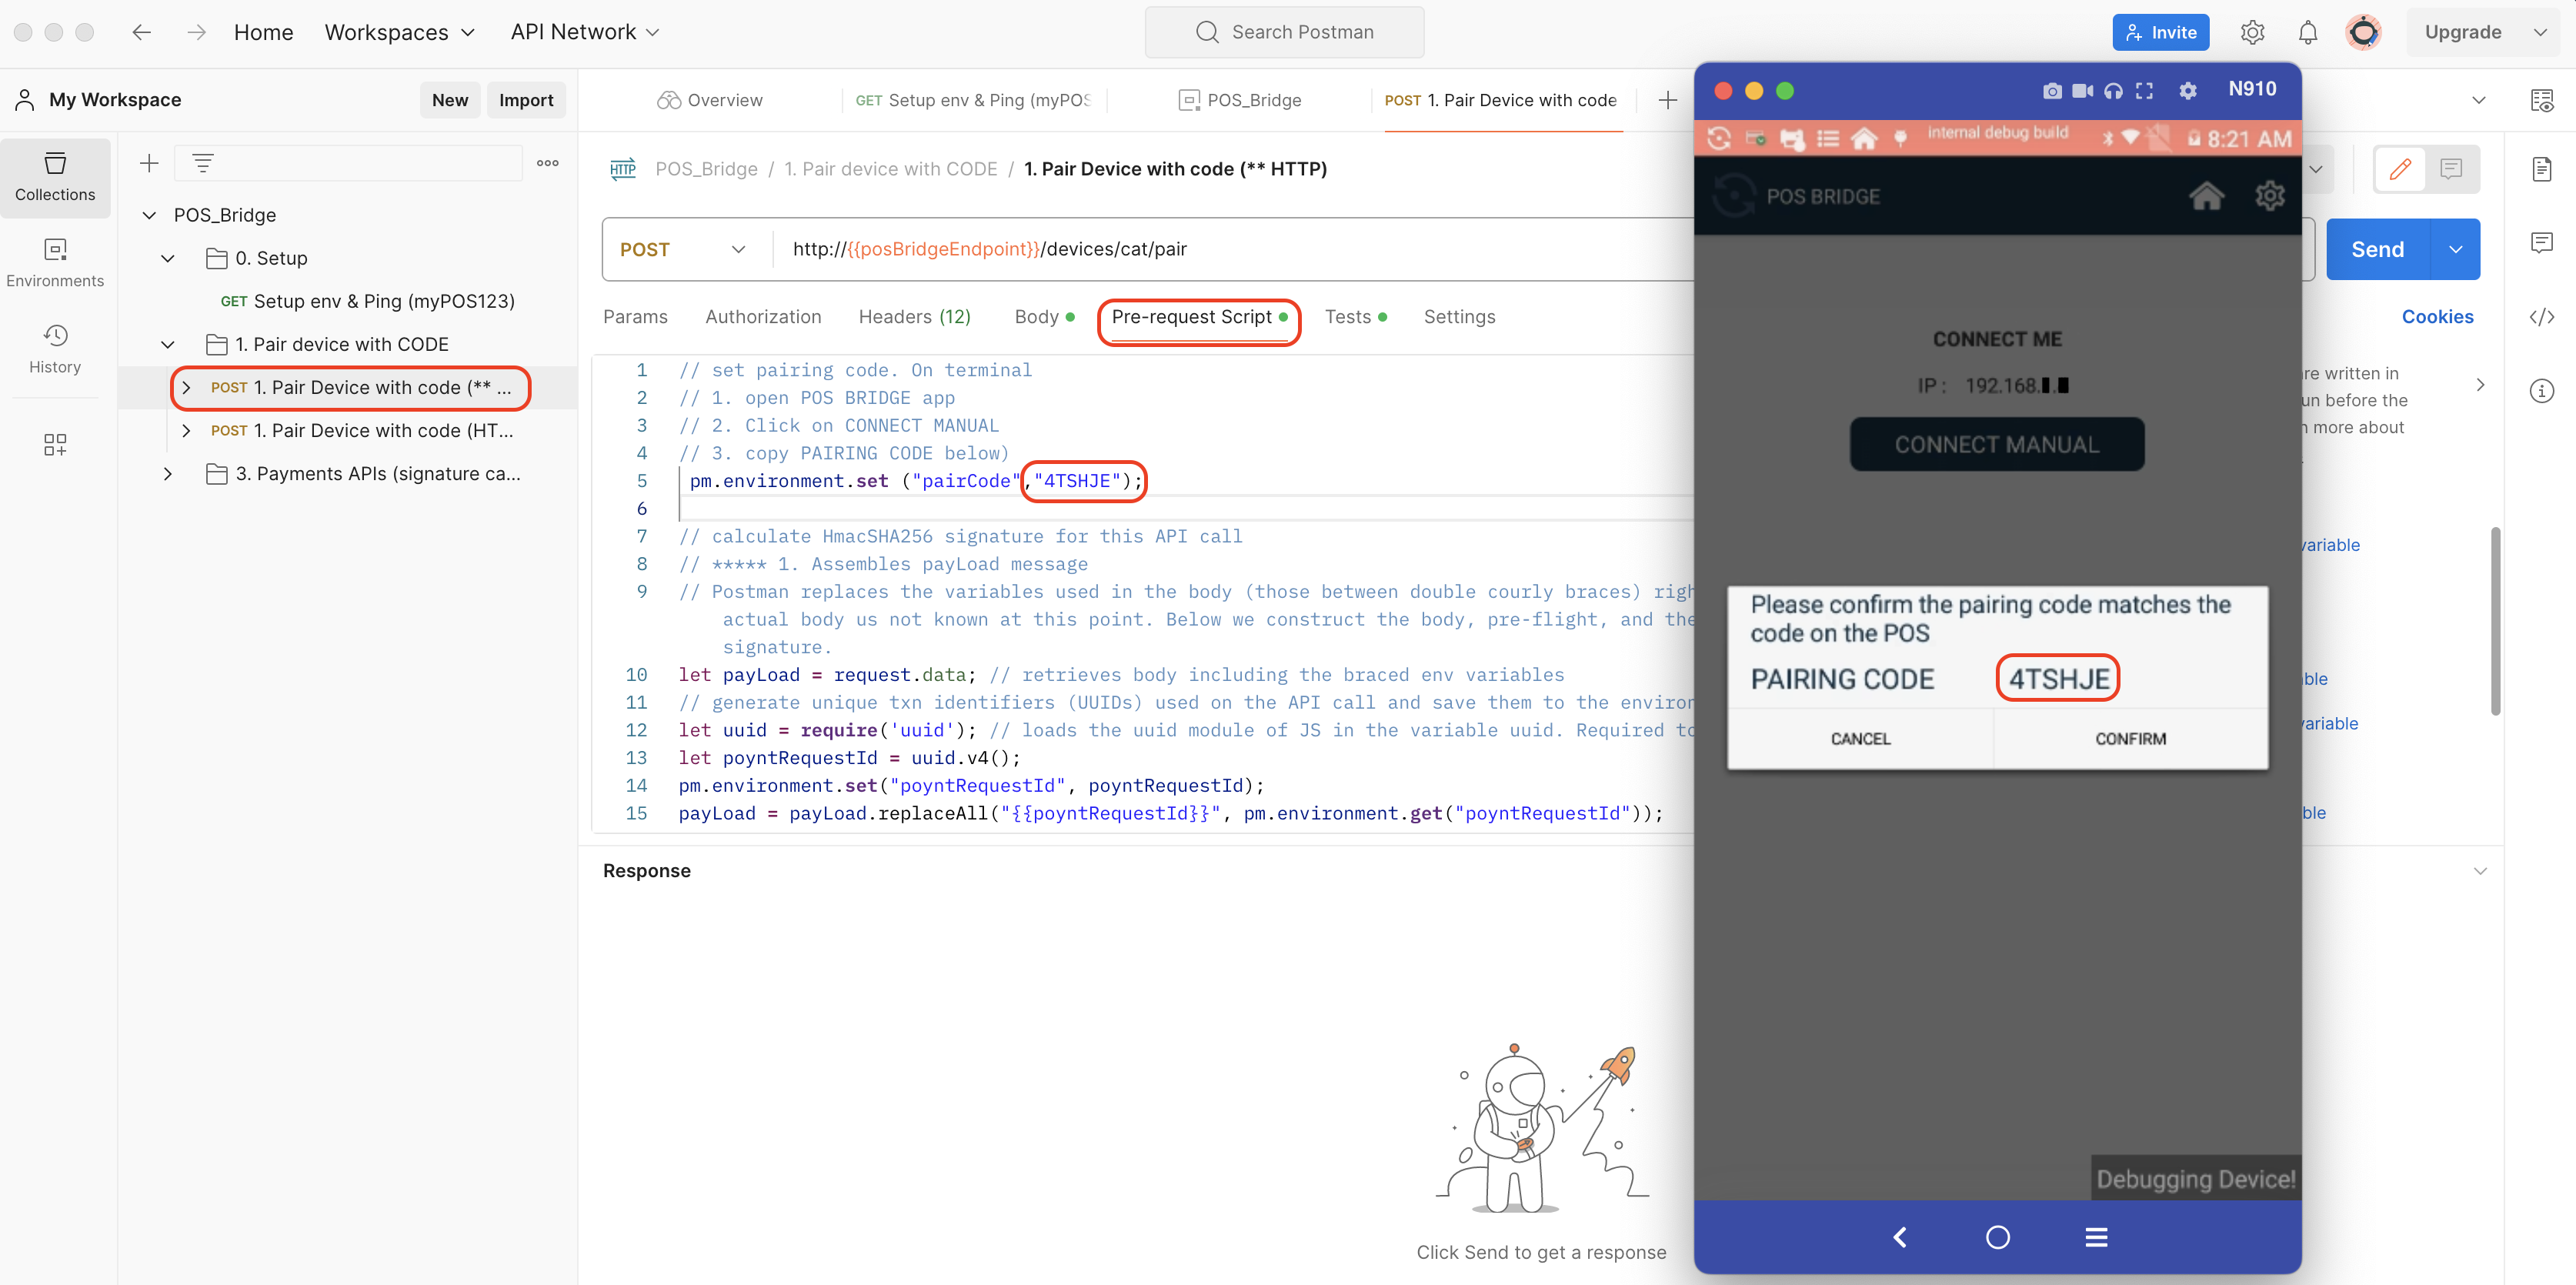
If the pairing is sucessful, you should receive a success message on the response body like the one below.
{
    "status": "SUCCESS",
    "poyntRequestId": "ff60ce15-xxxx-xxxx-xxxx-bfcab9a0434b",
    "serialNumber": "NXXXXXXXX"
}
After this, your device should be ready to begin testing the different endpoints supported by POS Bridge, which are available in the Payments APIs folder within the collection.