# Managing Your App
Once your application is created, you will automatically receive a series of credentials within our system, which you can find in the App Settings section in the OVERVIEW tab.
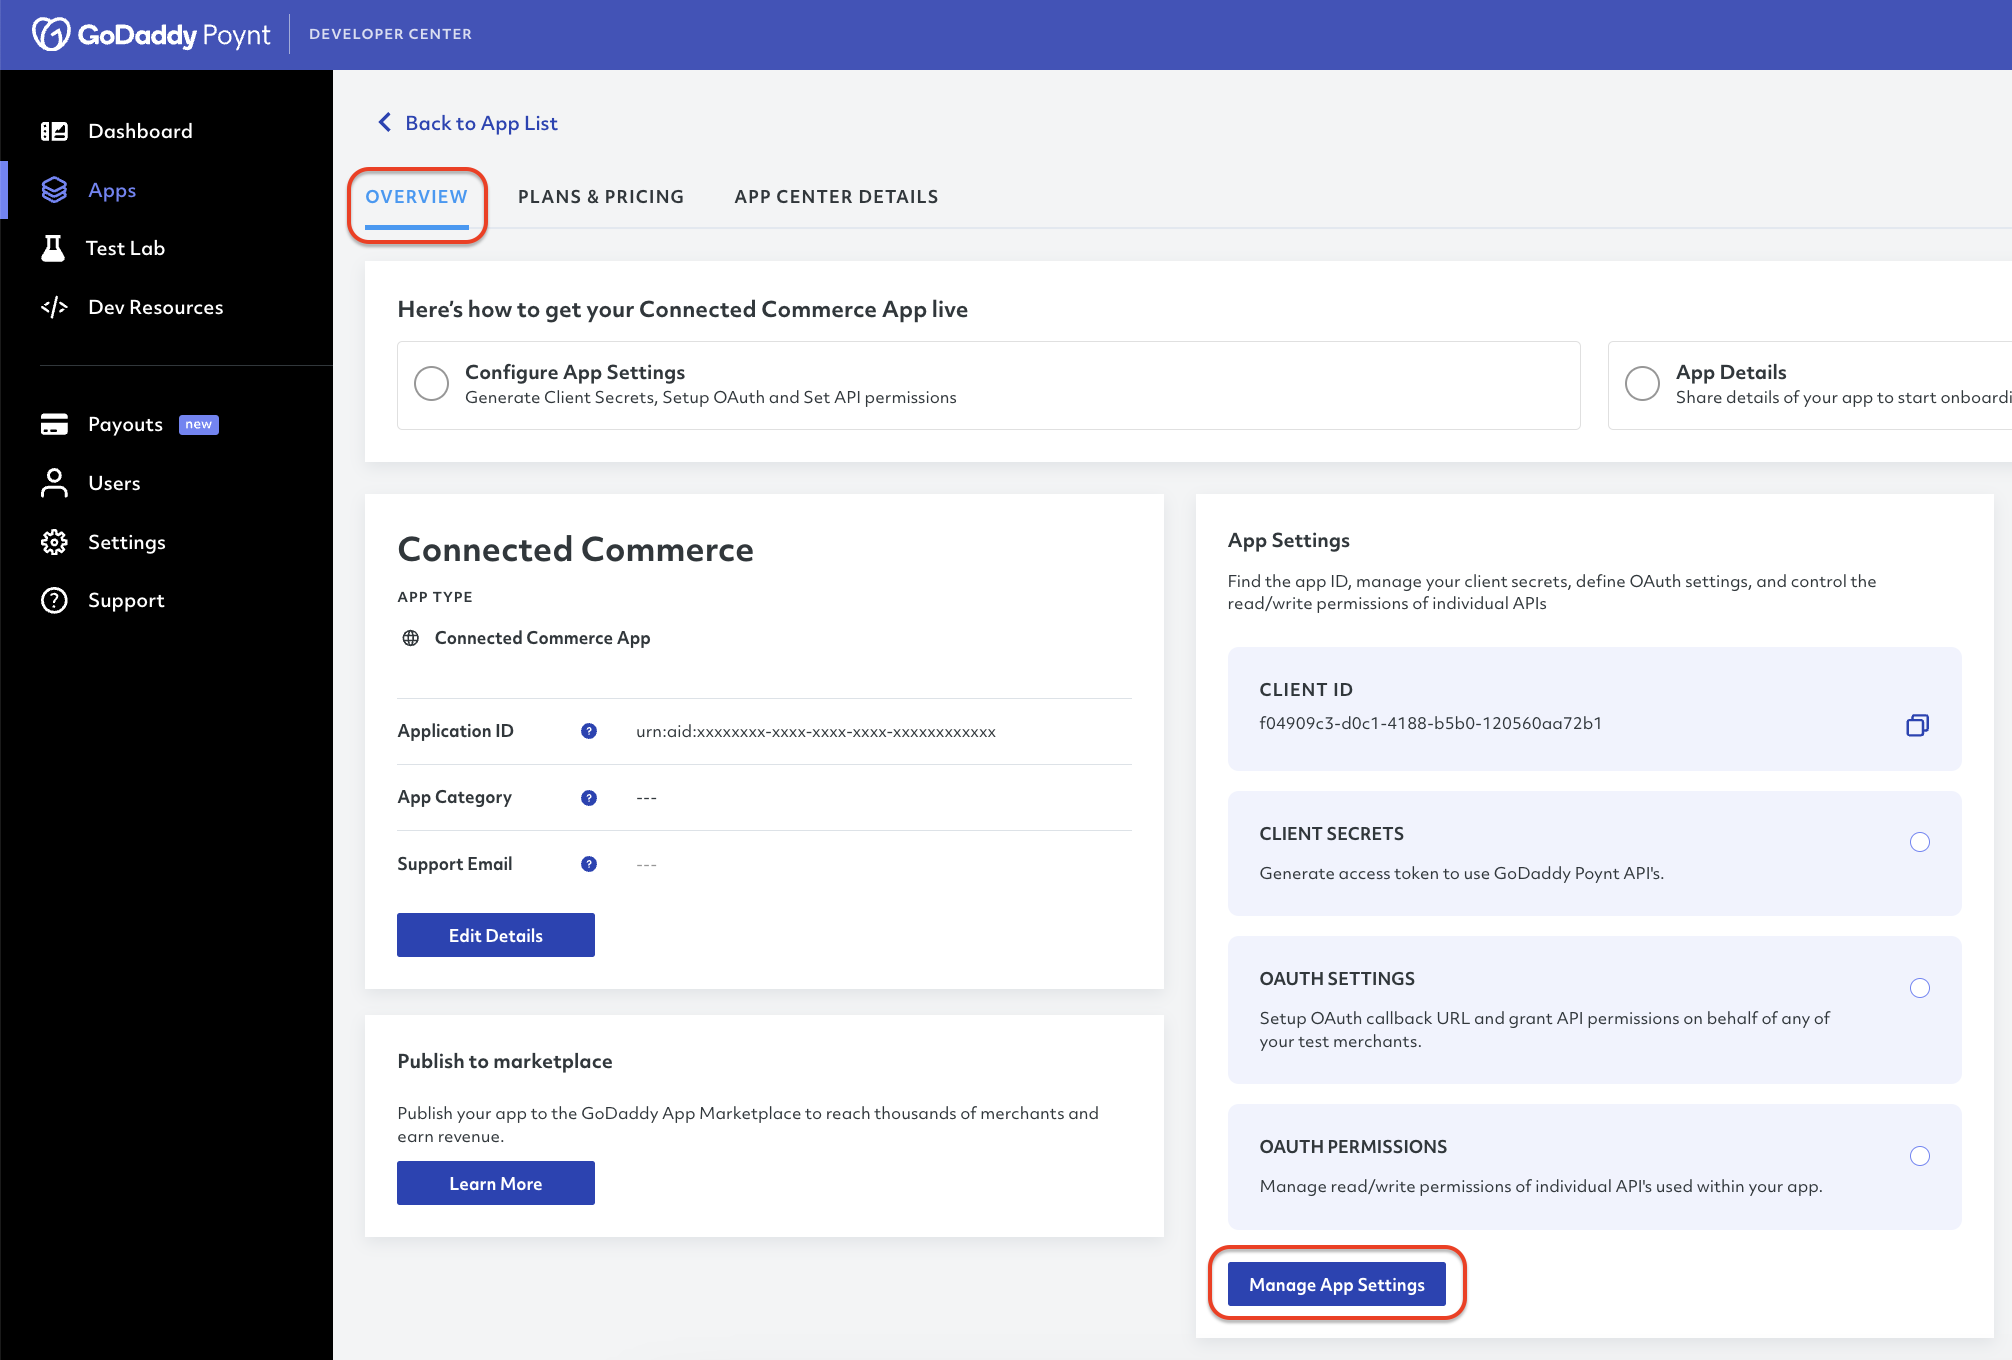
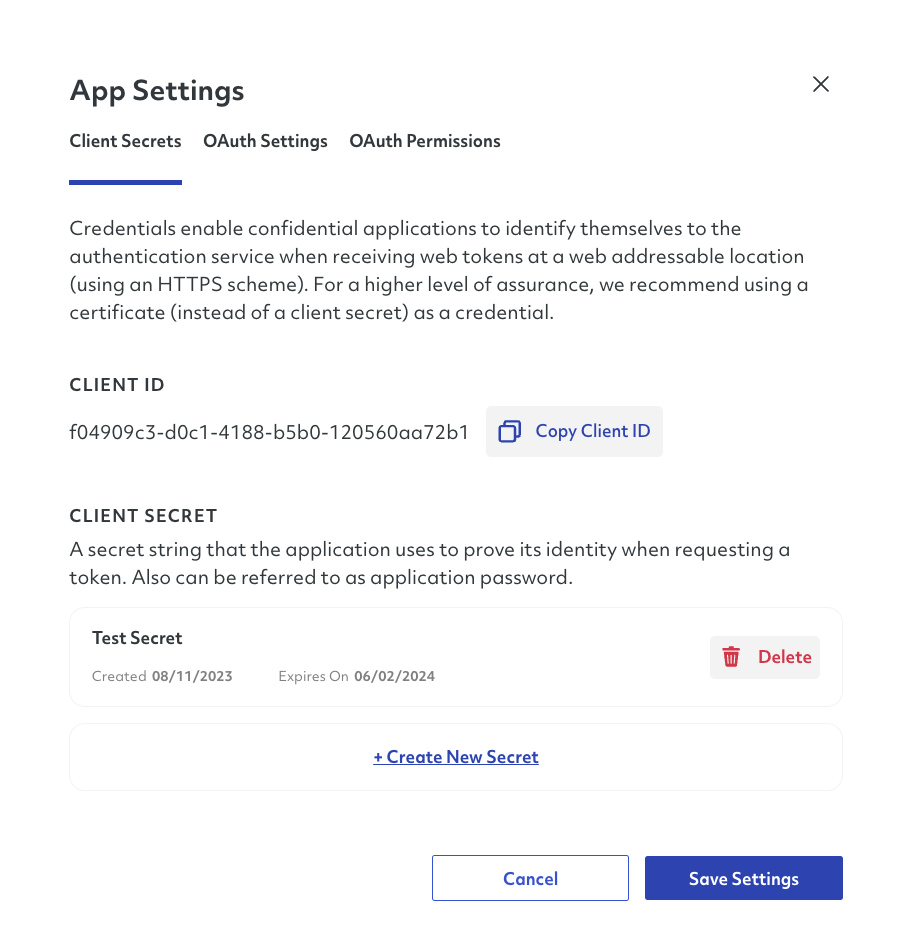
If you click Manage App Settings, it will open an additional section containing three sub-tabs: Client Secrets, OAuth Settings, and OAuth Permissions.
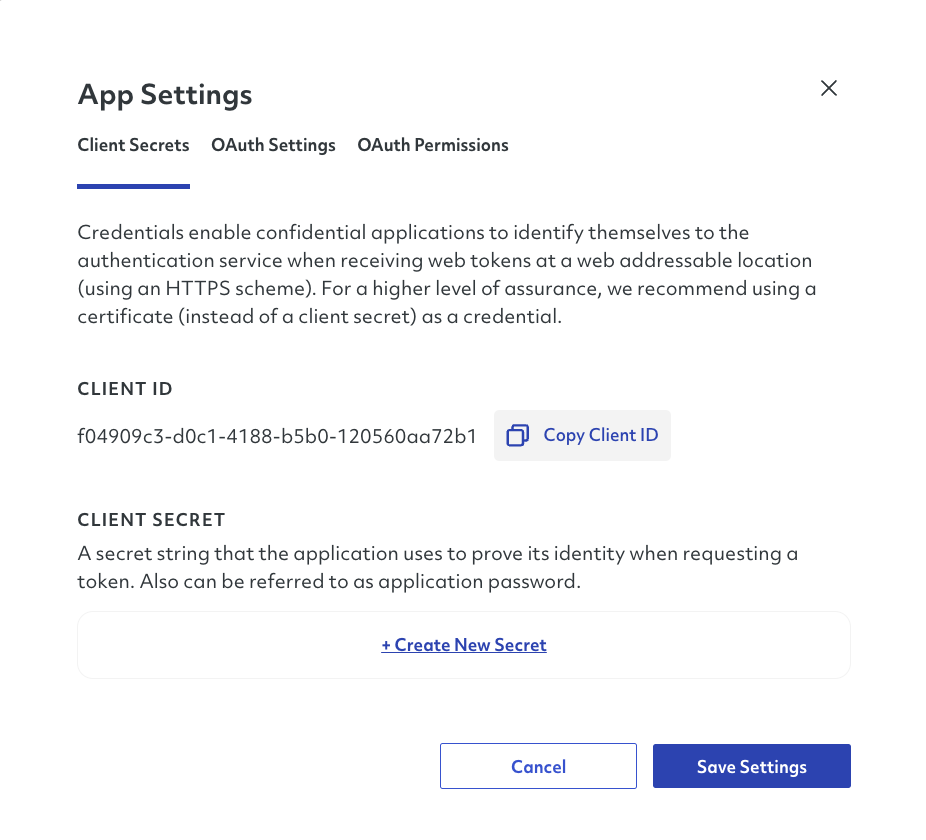
# Client Credentials
The first tab in this section will be the Client Secrets (also known as application credentials), which will serve as means of identification when making a call to our APIs.
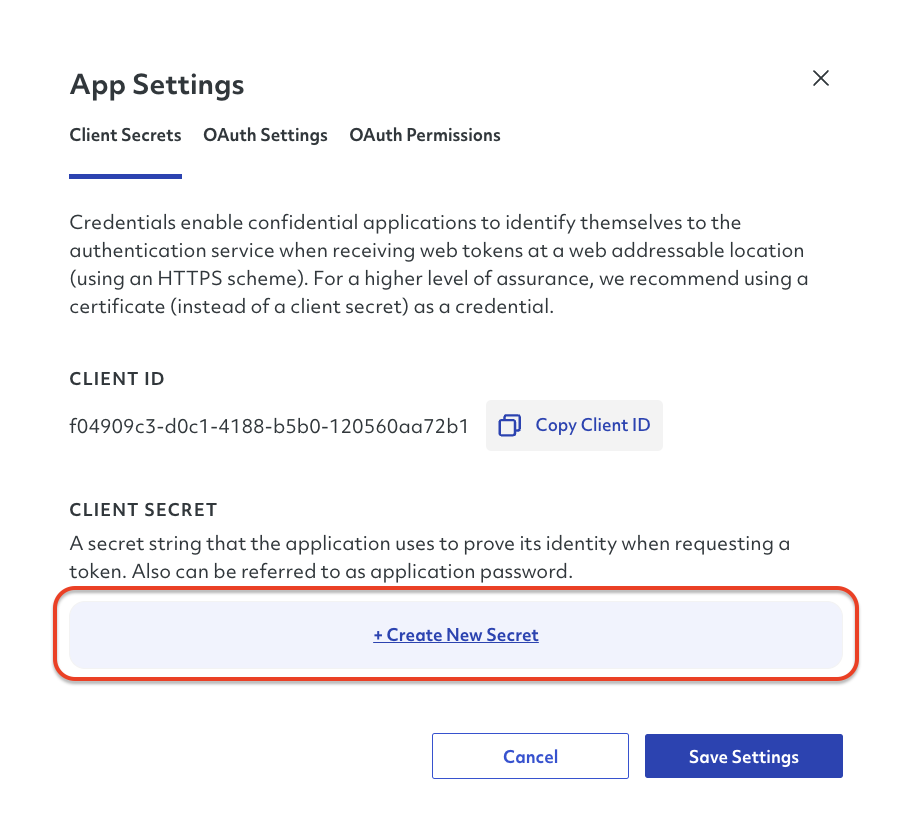
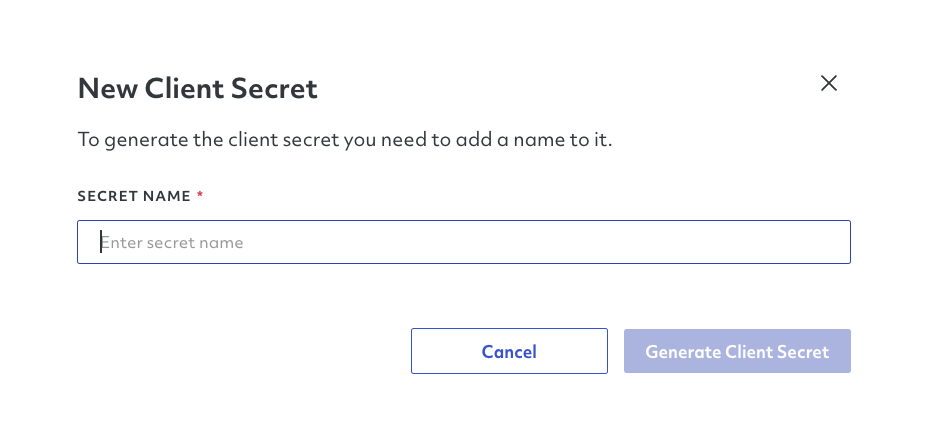
If you wish to create one or more secrets, you can click the button +Create New Secret
You will be prompted to provide a name for your secret, which will enable the button Generate Client Secret.
Once the client secret is created, you will be offered to show, copy and download your secret to your device.
NOTE
Please make sure to store this client secret somewhere safe as you will not be able to see it again.
After saving your client secret, you can click Done to finish the process.
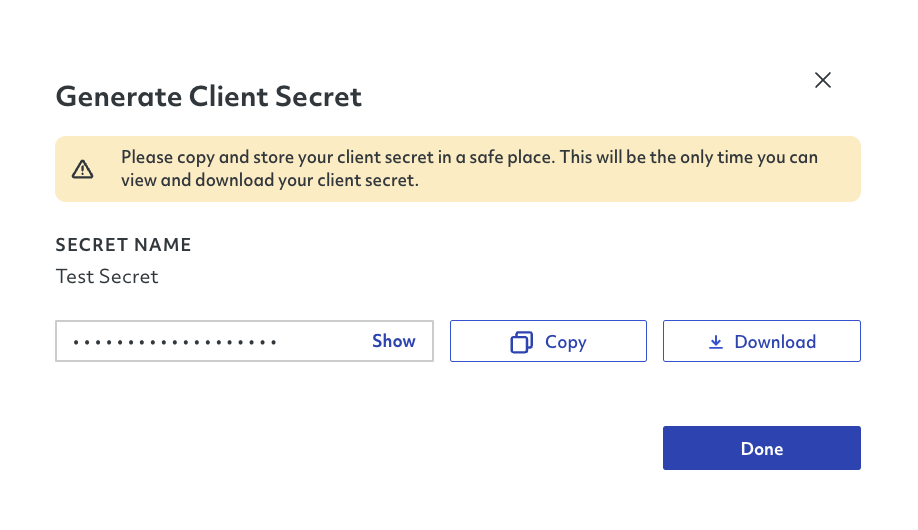
Once you are done creating your client secret, the page will refresh and show you the new client secret with a creation time stamp and an expiration date.
TIP
Remember to click Save Settings every time you make a modification to save your changes.
# Secret Rotation
It is considered a good practice to rotate your application's secret frequently. The GoDaddy authorization platform limits the secret validity to three months, so make sure to stay up to date with the expiration dates for any application's secrets.
# OAuth Settings
The OAuth Settings are composed of three specific items, OAuth Callback URL, Merchant Grant Access URL, and the Test Merchant API Permissions.
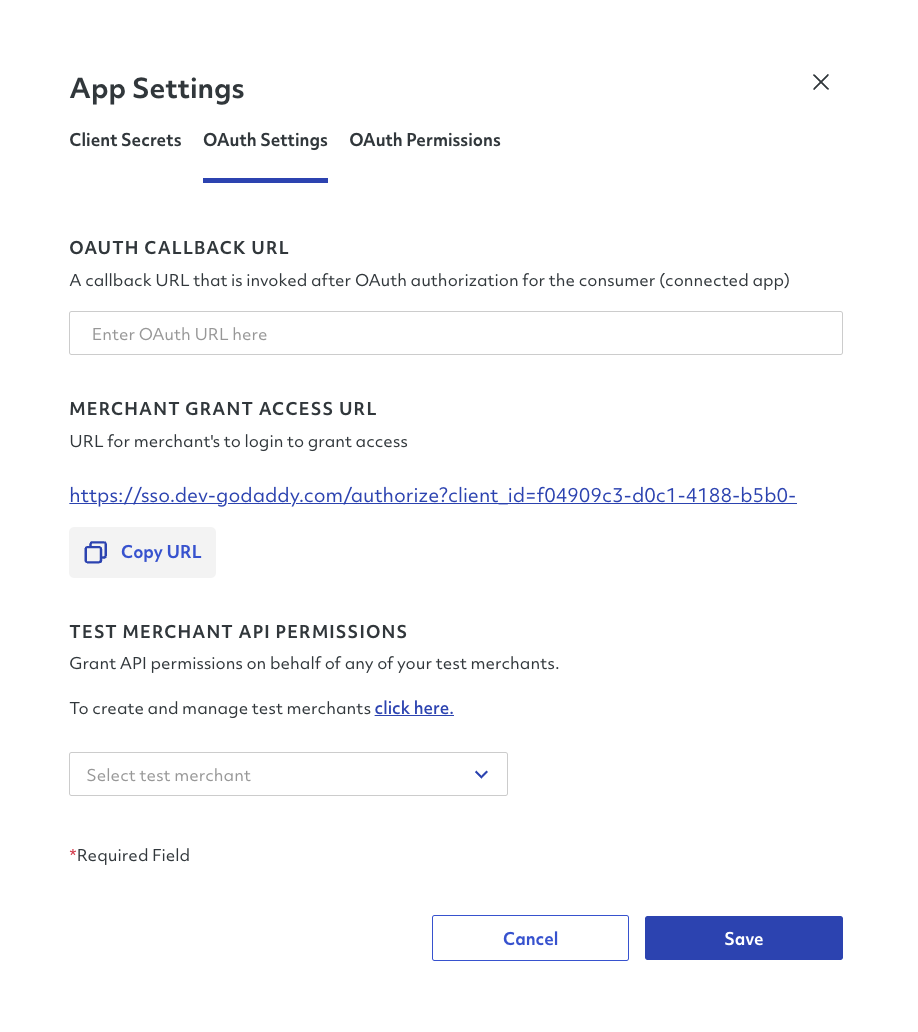
For the OAuth Callback URL, you must provide the URL that will be invoked after the OAuth Authorization is carried out.
The Merchant Grant Access URL is the URL that you would direct the merchant to log in and authorize your application.
The Test Merchant API Permissions will show a dropdown of all your existing Test Merchants for you to grant API permissions on behalf of the test merchant. This step is ideal for testing your application and guaranteeing proper app functionality.
Once you provide the necessary details for each sub-section, you must click Save to keep your changes.
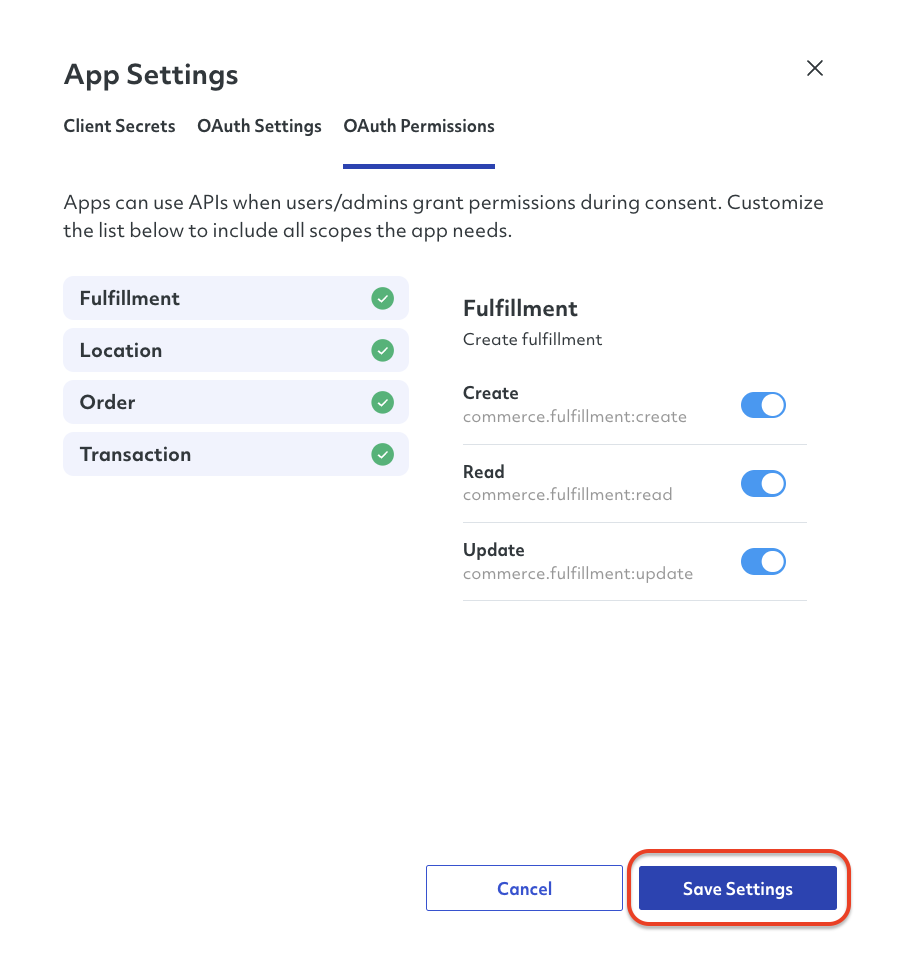
# OAuth Permissions
Finally, the OAuth Permissions section contains all the different APIs that your application can leverage as well as the different scopes (read / write) it would require access to.
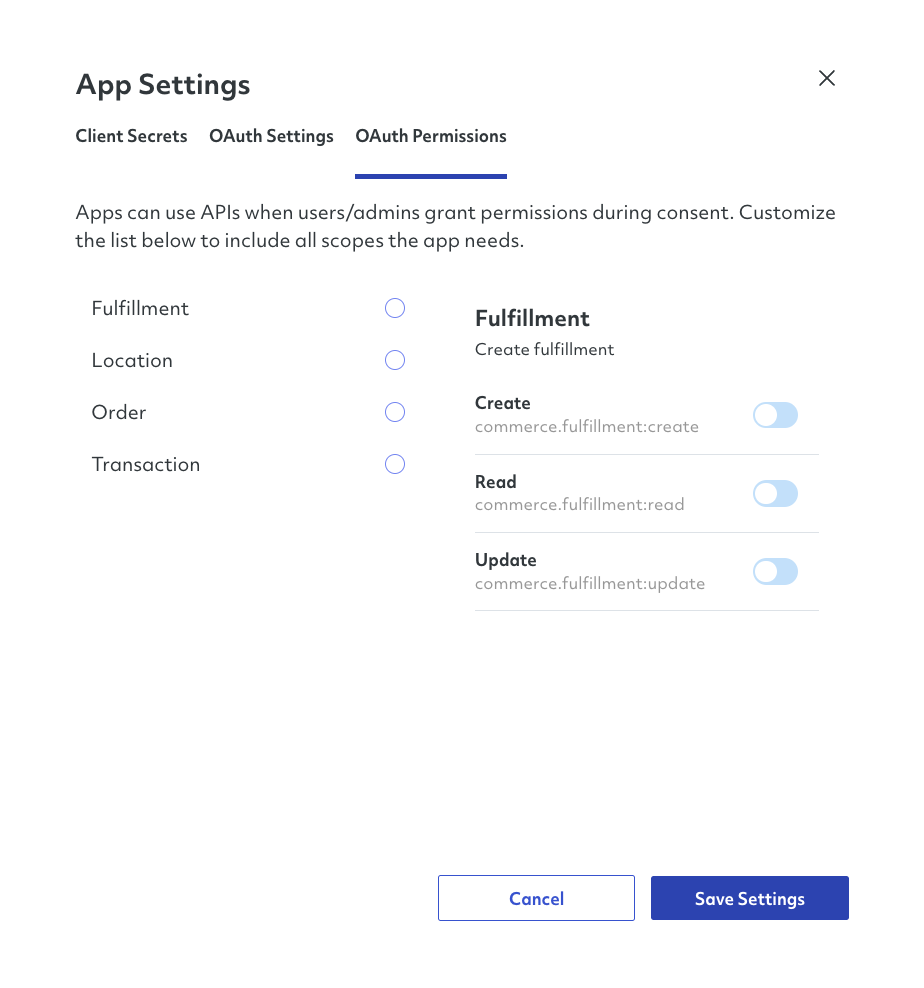
To establish the API permissions, you must click on each individual API and toggle any of the actions you need to activate depending on your app’s functions.
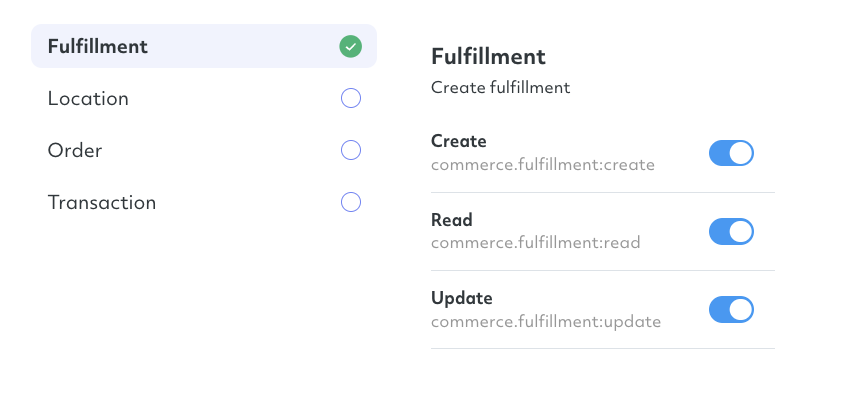
Once you define permissions for each API, you must click Save to keep your changes.